Changing your wheel from Shimano to Campagnolo or vice versa isn’t something you’ll do every day. But it’s a handy skill to have should you find that once in a lifetime bargain wheelset.
If you’re planning on upgrading your groupset but are worried about whether it will be compatible with your current wheels, fear not. This article will show you how to change the freehub body on your current Campagnolo rear wheel to make it compatible with SRAM/Shimano, or vice versa. It should be noted that SRAM and Shimano freehub bodies are the same so if you’re looking to change between those two, ignore this article!
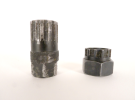
The basic difference and reason why we need to change freehub bodies between groupsets is that the splines on the body are a different pattern, so a Campagnolo cassette will not slide onto a Shimano/SRAM body. Similarly Campagnolo will not fit on the other.
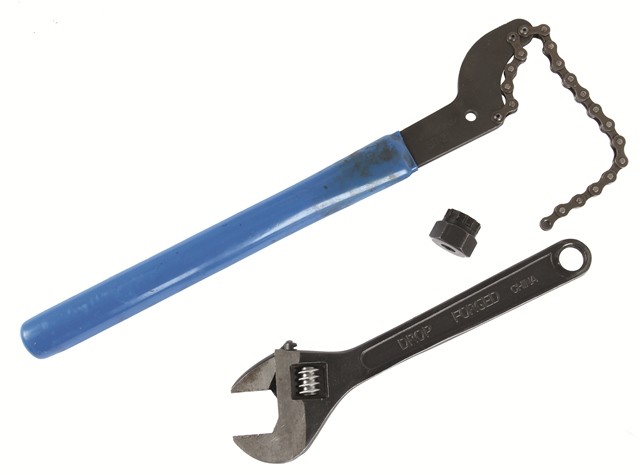
The tools you will need for this fairly basic operation include:
- Chain whip
- Cassette lock ring tool to suit both groupsets – the one you are changing from and the one you are changing to
- Adjustable wrench
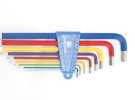
- Allen keys in a range of sizes
The Method
- Remove your back wheel from the frame and then remove the quick release skewer from the hub. Be sure to keep all parts of the quick release together so no springs or nuts are lost.
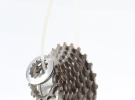
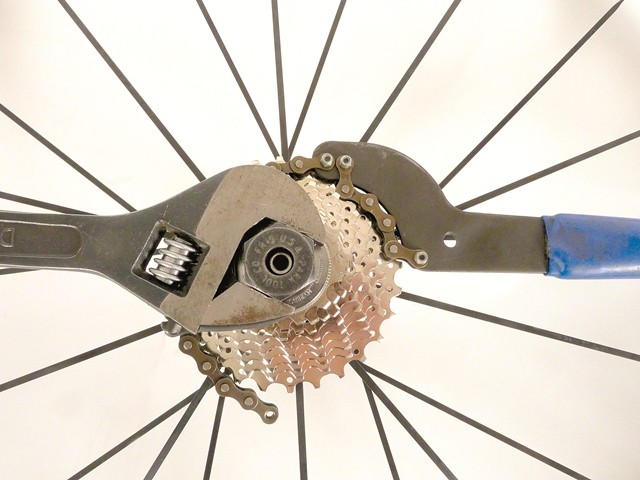
- Using the lock ring tool, an adjustable wrench and a chain whip, loosen your cassette and then slide it off the freehub body. If you’re not sure how to do this, we covered removing the cassette in Bicycling Australia Issue 176 If you’d like a PDF of this procedure send us a mail to editorial@bicyclingaustralia.com
- As with the quick release skewers, ensure all parts of your cassette are together and in the order you removed them (you can do this by looping a cable tie through the centre of the cassette)You should now be left with just the freehub body on the axle of your wheel.
This procedure can vary depending on your wheel. The process I will describe is for the most common wheels, such as a Shimano or Mavic and most others. Some wheel manufacturers have their own way of replacing a freehub (such as Zipp) that is quite complicated. If you do have a wheel that doesn’t match the description that follows, I urge you to take it to your local bike shop to change the freehub rather than attempt it yourself and risk losing vital small parts.
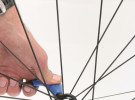
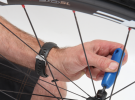
- Insert a 5mm Allen key into either end of the axle (size of retaining nuts on either end of axle may vary. For example, on many Mavic wheels the size of the non-drive side nut is 10mm) and turn anti-clockwise to loosen. These nuts may be very tight!
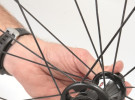
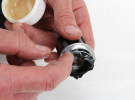
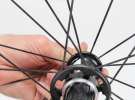
- Remove the nut on the drive side and then very carefully remove the freehub body, ensuring the pawls and springs don’t come flying out! Gently is the way to go. If the pawls and springs do come out, you should be able to get them back in.
You will see a whole lot of teeth on the inside of the hub. These, along with the pawls on the freehub body make up a ratchet system to engage the wheel when pedalling, but disengage when you stop pedalling. The teeth and pawls are similar across all manufacturers’ freehub bodies (Shimano/SRAM and Campagnolo). The only part that changes is the pattern of the spline on the freehub body itself. You will need to grease these up before you put the new freehub on.
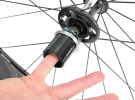
- Now slide your new freehub onto the axle of the wheel and fit the retaining nut. Don’t forget to check that the internal spacer is sitting flush by inserting your little finger and running it around the end. Use both Allen keys again to tighten.
- It’s not the worst idea to purchase a new cassette of your preferred brand to put on your wheel, although many readers will have multiple cassettes in the shed.
- Tighten your cassette into place with the new locknut (which will have come with the new cassette) and insert the quick release skewer back through the axle, returning your rear wheel into the frame of your bike.
And there you have it! You have replaced your freehub body, the catalyst for changing brands of groupsets on your bike. Just remember that each wheel has a slightly different process of removing the freehub and as mentioned, if you don’t feel entirely confident with it, don’t hesitate to take your wheel down to your local bike shop for some professional assistance.