A BRIEF HISTORY OF THE RIM
From the time of the earliest pneumatic tyre (thanks Mr Dunlop) through to the mid-80s the best (sometimes only) option was a tyre glued to a gently concave profile rim. Those early rims were made of nature’s original composite material; wood. Wood is relatively strong and light, but it doesn’t provide a brilliant braking surface, that same braking can erode the rim quickly and the whole rim can warp with changes in humidity. Metal rims were a real advance on wooden rims in most ways.
By the 1950s recreational bikes had steel clincher rims, but proper road bikes still used singles on aluminium rims. Finally in the 80s the first raceworthy (though not so great by today’s high standards) clincher tyres were available for sale.
Coupled with aluminium rims a road bike could have a fairly light substitute for singles with the huge advantage of being able to safely and easily repair a puncture at the roadside. The road bikes with clincher rims in the 70s had 27” steel rims (630 mm). Steel rims worked really well in the dry but the coefficient of friction in the wet was far too close to zero. Alloy rims in the same size as singles (622 mm) meant the wheels were freely exchangeable (train on clinchers, race on singles).
Now the state of the art is a carbon rim. Early carbon rims were singles-only, creating a modest renaissance for glued-on tyres. Now that we have a better understanding of carbon fibrefabrication, the carbon clincher is a very safe and light option. Like those early wooden and steel rims, carbon rims didn’t stop in the rain very well at first. Modifications to both the braking surface and the brake pad means that right now you can ride carbon rims in the rain without too much concern.
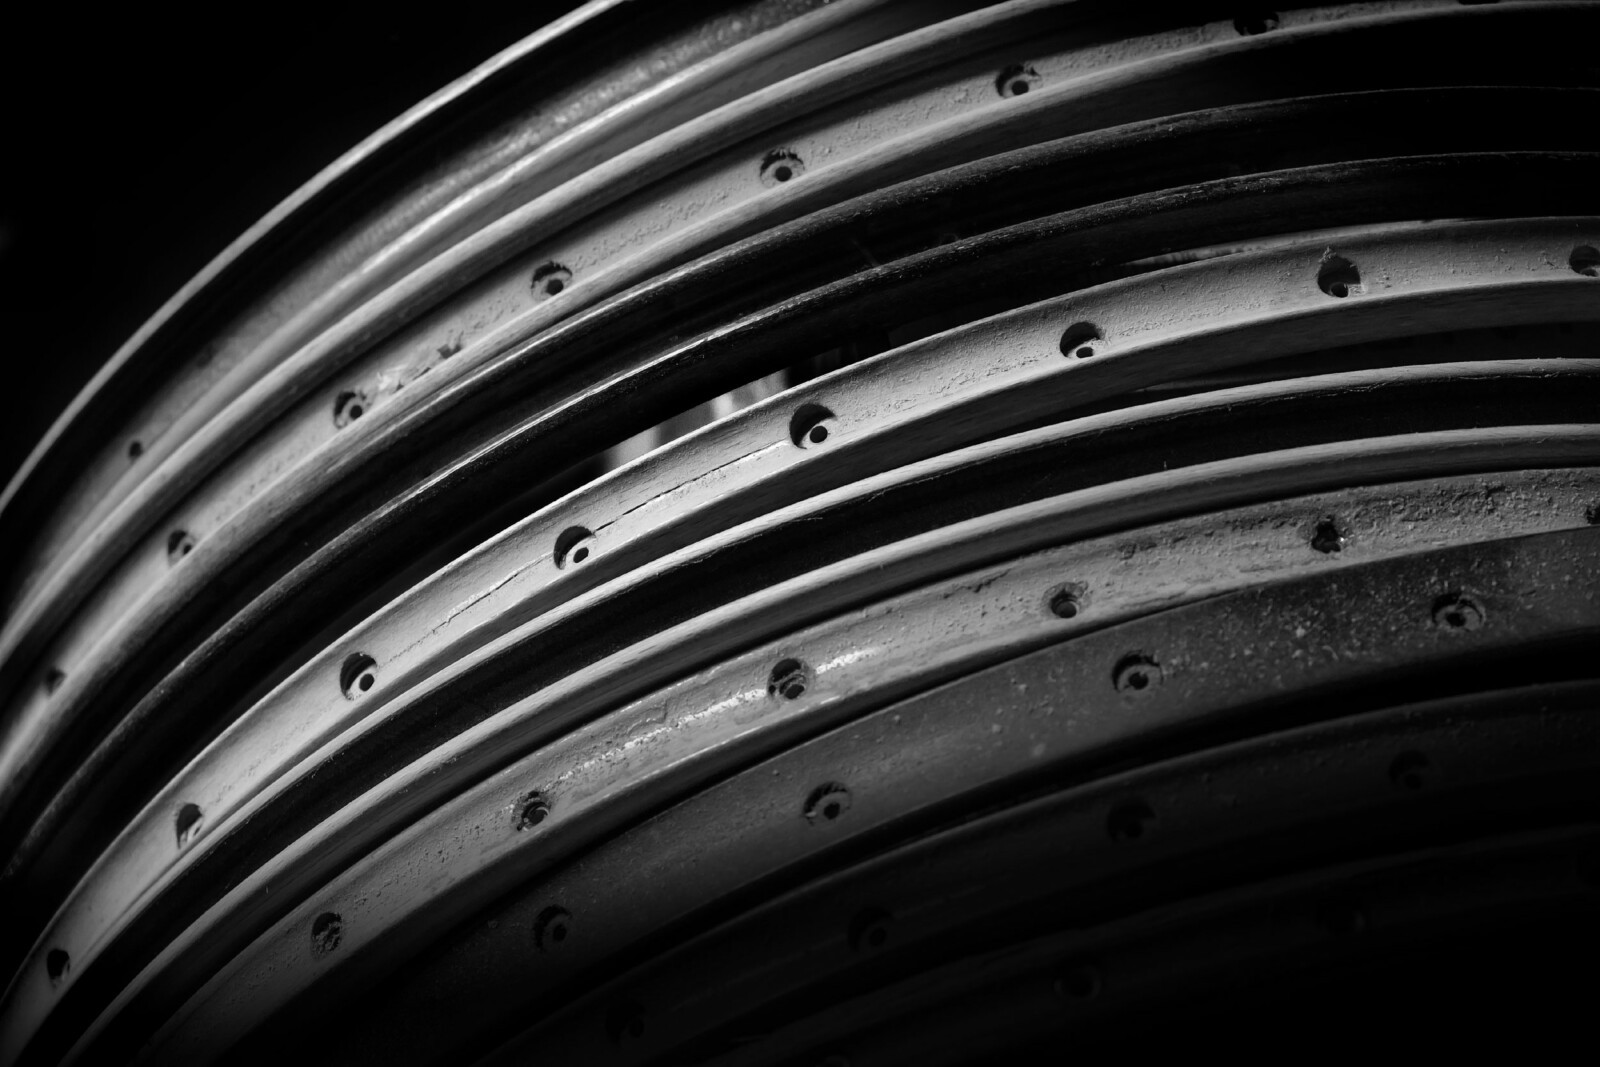
Those original wooden rims were solid wood. Steel is very strong and heavy so steel clincher rims are single-wall. That is, they are built like an open U-channel. Inexpensive aluminium rims are still built this way, but it didn’t take long for double-wall rims to come along. With an extra cross piece in the middle of the U the strength and durability of the rim is markedly increased.
A boxed structure is much stronger than an open structure.
Figure 1 through 3 show the different rim cross sections: 1 is an alloy single wall rim (steel ones lack the tubular channels but aluminium really requires that), 2 is a double wall rim they really should be called double floor), 3 is a carbon rim without internal structure. When manufacturing moved to carbon they adopted the same double wall shapes that had been perfected for aluminium rims. The problem is that carbon is a very different material to aluminium and only recently have we learned that alternative shapes can work very well for carbon. Ironically it looks like the single wall rim option is the optimum for some uses (particularly wide and shallow rims) while deep section rims will continue as a variation of #3.

MATERIAL SCIENCE
A quick lesson in some material science terms.
Aluminium is isotropic – it is the same in every direction. Carbon is anisotropic – it is clearly not the same in every direction (and it takes a lot of design work to make it act this way if that is the desired result). Some parts of the rim (spoke hole area, brake track and sidewalls holding in the tyre pressure) are under a lot of strain while other parts (the middle of the sidewall between the two floors) are pretty much along for the ride. Carbon allows a lot less material in the sidewalls compared to aluminium.
Aluminium is ductile – it can bend without breaking. Carbon is not renowned for its ductile nature – it tends to shatter under large impact. If you absolutely have to get through a ride on one rim (like some types of MTB racing which restrict equipment changes) then that rim should be aluminium. If you have a spares car behind you then you should be using carbon.
BRAKING
Up until very recently all performance road bikes used rim brakes. The rim just happens to be a very big brake ‘rotor’ and it functions really well in that role. Or does it? I’ve never ridden a wooden rim in the wet, but I am assured that varnished wood against is not renowned for its ductile nature – it tends to shatter under large impact. If you absolutely have to get through a ride on one rim (like some types of MTB racing which restrict equipment changes) then that rim should be aluminium. If you have a spares car behind you then you should be using carbon.
BRAKING
Up until very recently all performance road bikes used rim brakes. The rim just happens to be a very big brake ‘rotor’ and it functions really well in that role. Or does it? I’ve never ridden a wooden rim in the wet, but I am assured that varnished wood against vintage rubber pads didn’t provide the most reassuring braking performance. And once you wore through the varnish you ate into the structural wood of the rim.
Steel rims brake very well in the dry, but almost not at all in the wet. The compromise was to put texture on the brake track so that the pad had something to grab onto, but it meant a noisy compromise in braking all the time (degraded dry performance in return for some slim wet performance).
Aluminium rims brake very well in the wet, but depending on the pad compound and the local conditions it is possible to wear through the rims in a very short period of time when wet. Ceramic coated aluminium rims were a solution to this, mainly aimed at the mountain biking side of things but also quite popular in road rims for a while. The ceramic coating was very durable (to the detriment of the pads) but very brittle; it flaked off if you bumped it too hard.
Carbon rims aren’t inherently good for braking. Early rims were in fact terrible. I still remember the first time I raced against a guy on carbon rims with the stink and noise he made on every big descent really putting me off the idea. But brake pads and brake tracks both got better. Most wheels now ship with matched pads that are designed as a pair to work together.
Finished carbon structures are produced by heating carbon fabric and resin in a mould. You might have noticed some rim companies talking about their high Tg resin – the temperature at which the resin transitions from solid to glass (a semi-solid state that does a terrible job of resisting air pressure in the tyre) has gotten higher over the years of development. Those of you who hurtle down hills rarely touching your brakes are quite safe on low Tg rims. Those of you who cautiously ride down, constantly on the brakes, are putting a lot of heat energy through your rims and are in danger of literally exploding your rims.
This very nasty explosive behaviour even happened in a Pro race recently when they neutralised the descent on a ridiculously hot day – the whole bunch rode gently down the hill together in the nearly 50 degree heat and many riders had wheel problems.
Many modern, high Tg rims coupled with their matched brake pads are incapable of achieving the Tg temperature in normal circumstances — an excellent development.
That is in the dry. But what about in the wet? Well most carbon rims don’t change too much in the wet. Some models have something added to the outer layer of the brake track (almost like the ceramic coating on alloy rims, but not layered on) to improve braking performance. Glass fibres, basalt and interesting textures are just a couple of examples.
Disc brakes are having a difficult introduction into the pro ranks – many pros don’t want to go disc at all. But it is clearly the case that disc brakes remove the duality of function from the rim allowing the rim shape to be dictated purely by tyre holding functions and/or aerodynamics without care for durability and without having to withstand the big squeeze from the pads. It also means a small to moderate wobble in the wheel will not trouble the rider as it no longer rubs on the pads. Discs also work great in the rain.
RIM WEAR
Using the rim as your brake rotor will eventually wear out the rim. It can be a catastrophic end too, as the air pressure in the tyre causes the very thin rim wall to explode outwards. Usually it ends with more of a whimper, as the now bulging rims rub on the brakes causing the owner to seek professional advice well before the exploding thing occurs. Many rims now have a small depression drilled into the braking surface from the backside. When this hole appears it is a literal window into the fact that the rim is worn out.
RIM WIDTH
I remember buying a bike about 20 years ago. Every bike I looked at either had 18 or 20mm wide tyres. Try finding an 18mm tyre these days! Even the ubiquitous 23mm road tyre is giving way to 25mm and wider tyres (my race bike has a 24mm in front and a 26mm in back as I type this). Across a lot of different vehicle types (from bikes to cars and buses and motorbikes) the optimum tyre:rim ratio is around 1.5:1.
Thus that 18mm tyre should be happy on a 12mm wide rim (inside dimension) and in fact rims at the time varied from 11-13 mm wide. Perfect.
It meant that a 23mm tyre was about as large as you could reasonably go. Check out current rim widths – 17-18mm is where it’s at. Which means a 23mm is about as small as you can safely go, a 25mm is perhaps a tiny bit narrow and the 28mm tyre that used to be reserved for touring tyres are a practical option for racing on rough roads.
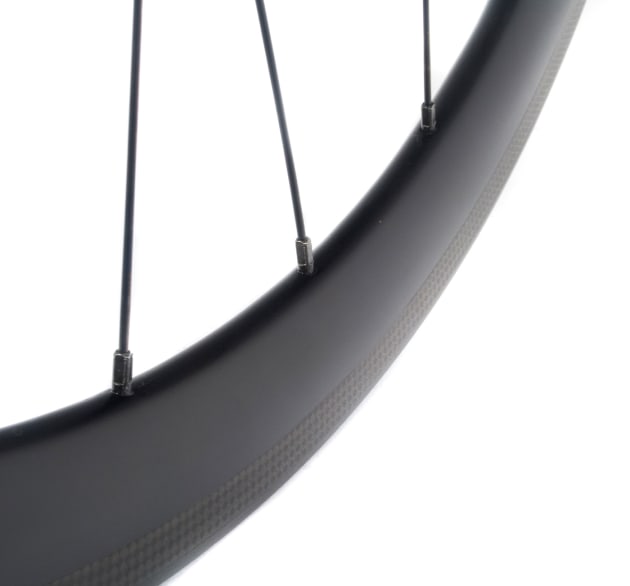
RIM DEPTH
Classic rims, made out of wood or aluminium or other materials were only tall enough to provide a brake track – about 15mm deep. These box section rims were as light as possible and quite strong. But they aren’t aero. I wrote in the first instalment how the Shamal, the first aero wheel and also the first whole wheel, led the change in the industry from wheel parts to wheel assemblies. The Shamal was a very deep rim that provided clear aero benefits compared to the shallow box rims common at the time. Now check out the catalogue of any wheel company. There should be 25mm shallow rims (pure climbing), 35mm rims or 50mm rims (a good all-around depth that can still climb but is also fast on the flat), 60mm rims (getting a bit heavy for the big mountains and a bit scary in crosswinds) and more up to 110mm rims (only suited for calm, flattish time trial type efforts). Literally a rim for every situation.
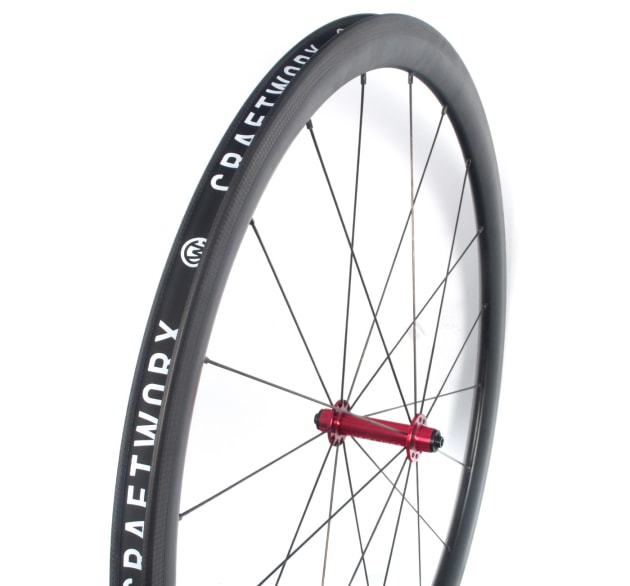
SPOKE HOLES
With virtually all wheels, the rim is made into a round hoop and then the spoke holes are drilled into the material. This was true for wooden rims and is still true for most carbon rims. One issue with carbon, however, is the actual fibres that the material gets its strength from. Drilling cuts through lots of fibres. This means the spoke hole area has to be thicker than optimal in order to retain adequate strength after the drilling. A very few companies are making their rims with the spoke holes moulded in from the beginning to avoid this issue.

On most rims the spoke holes are slightly offset towards the hub flange that the spoke comes from. The first hole after the valve hole can be towards the drive side or the non-drive side. While it doesn’t matter when you build a wheel the first time whether you are using a left-handed or right-handed rim, when it comes time to rebuild the rim it is best to use the same handedness.
Some rims are asymmetrical. All the spoke holes are offset towards one side of the wheel. In rear wheels this increases the bracing angle of the driveside spokes and decreases the angle of the off-side spokes. Which helps to even out the tension difference between them. This can also be used for front disc brake wheels with the offset going to the drive side this time because the rotor is on the off side.
The final relatively common variation in spoke hole drilling is to put twice as many spokes on the drive side as on the off side. Since the drive side spokes run about twice as tight as the off side spokes, putting in twice as many drive side spokes really evens out the spoke tension.
There used to be a real art to selecting the correct rim for the job and then matching that rim to the right number and style of spokes before finding a good builder to assemble the wheel for you. Now the wheel manufacturers do all the hard work for you and you merely pick a wheel that includes the rim that you require. It is, however, still the case that the rim is the determining factor in the purpose of the wheel.

Michael Hanslip
Michael Hanslip - Michael has been racing all kinds of bikes, coaching, bike fitting, cycling commuting, and contributing to BA from Canberra for over 30 years.