This final step ensures there are no small leaks around the bead-to-rim junction. Hold the rim at a 45-degree angle with the tyre resting on the ground. Once the sealant has settled towards the bottom of the tyre, give it a bounce and a shake to slosh the sealant against the sidewalls. Now move the tyre around an eighth of a turn and repeat. Do this all the way around on both sides and you’ll be ready to hit the road!
in

Tube Free Rolling

While roadies and racers have continued rolling on tubular and clincher rubber mountain bikers have been running their tyres without inner tubes for over 15 years. Mavic launched their UST system back in 1999 but tubeless really took off when Stan’s developed their sealant based NoTubes system; this allowed most regular tyres to work without an inner tube.

On the road, tubeless first popped up in 2006 but it’s taken a long time to gain momentum. Much of this has been due to the limited range of suitable rims and tyres. Due to the relatively high pressures, road tubeless tyres need extremely strong beads and you can’t just convert any old tyre by adding sealant. More recently however, the options have really opened up as many big name tyre brands have poured their efforts into developing high performance road tubeless tyres.

So what’s the point of road tubeless? For mountain bikers the advantages are clear; they minimise the risk of pinch flats—the prime cause of punctures on the dirt. With this you can run lower tyre pressures for better comfort and increased traction.

While pinch flats aren’t as common on the road, they can still strike if you fail to spot a pothole and will benefit those who ride on poor quality acne riddled bitumen. With the risk of pinched tubes eliminated, the tyre pressure can be dropped. Running 10-20psi less not only improves comfort, over rough roads it can also improve your speed as you won’t be getting bounced around as much. It’ll also assist with traction; both for cornering and out-of-the-saddle sprints.

For many, penetration punctures are a more common cause of flats. Roadside debris such as glass and wire can slice straight through the tyre casing. Most modern tubeless road systems run around 30ml of sealant inside the tyre, and this fluid is very effective at repairing any holes in the tread area. In many instances there will be next to no air loss when something sharp penetrates the tyre and you won’t need to stop. This is a major benefit if the roadside verge is littered with rubbish.

Of course no tyre is infallible. While latex based sealants will repair regular sized cuts and holes, a badly slashed tyre will still leave you feeling deflated. Even in this situation a tubeless setup gives you a better chance of limping home. Where regular tyres rely on the pressurised inner tube to keep them in place, the bead of a tubeless tyre locks securely to the rim. In a worst case situation, the solidly mounted tubeless tyre will allow you to limp home slowly with less chance of losing the tyre completely and incurring rim damage.

You can still fit an inner tube if the sealant fails to repair a puncture, and large sidewall cuts can be fixed temporarily with a $5 note or business card—it’s no different to a regular tyre in this regard.

Smoother rolling on bumpy roads, enhanced comfort and fewer ride-stopping punctures should all appeal to the rider who likes to get out and clock up the kilometres but what about the racer? This market segment is more concerned with outright speed and at a pro level has a rolling cavalcade of mechanics behind, so punctures are less of a concern. While the uptake on tubeless has been slow so far, attitudes are changing as tyre technology develops. The latest tubeless tyres are very close to the weight of a regular tyre and tube combo but also stand to offer lower rolling resistance.

A separate inner tube creates additional friction as the tyre casing distorts on the road surface. Eliminating the tube entirely removes this friction and recent testing has shown that a good road tubeless tyre rolls with less effort. Schwalbe pitted their Pro One Tubeless tyre against the equivalent One tube-type tyre and the tubeless model was measurably faster. This along with the aforementioned advantages has Schwalbe heralding tubeless as the future for road tyres.

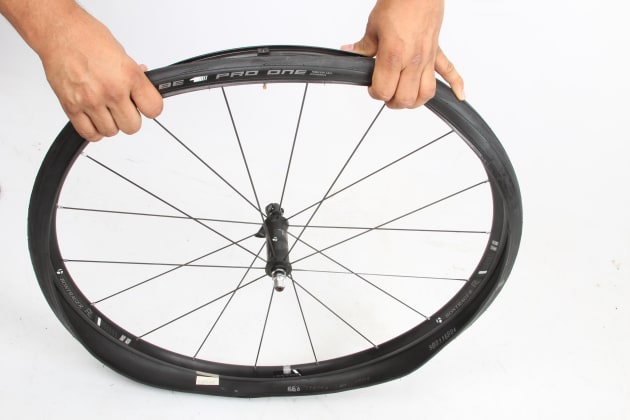
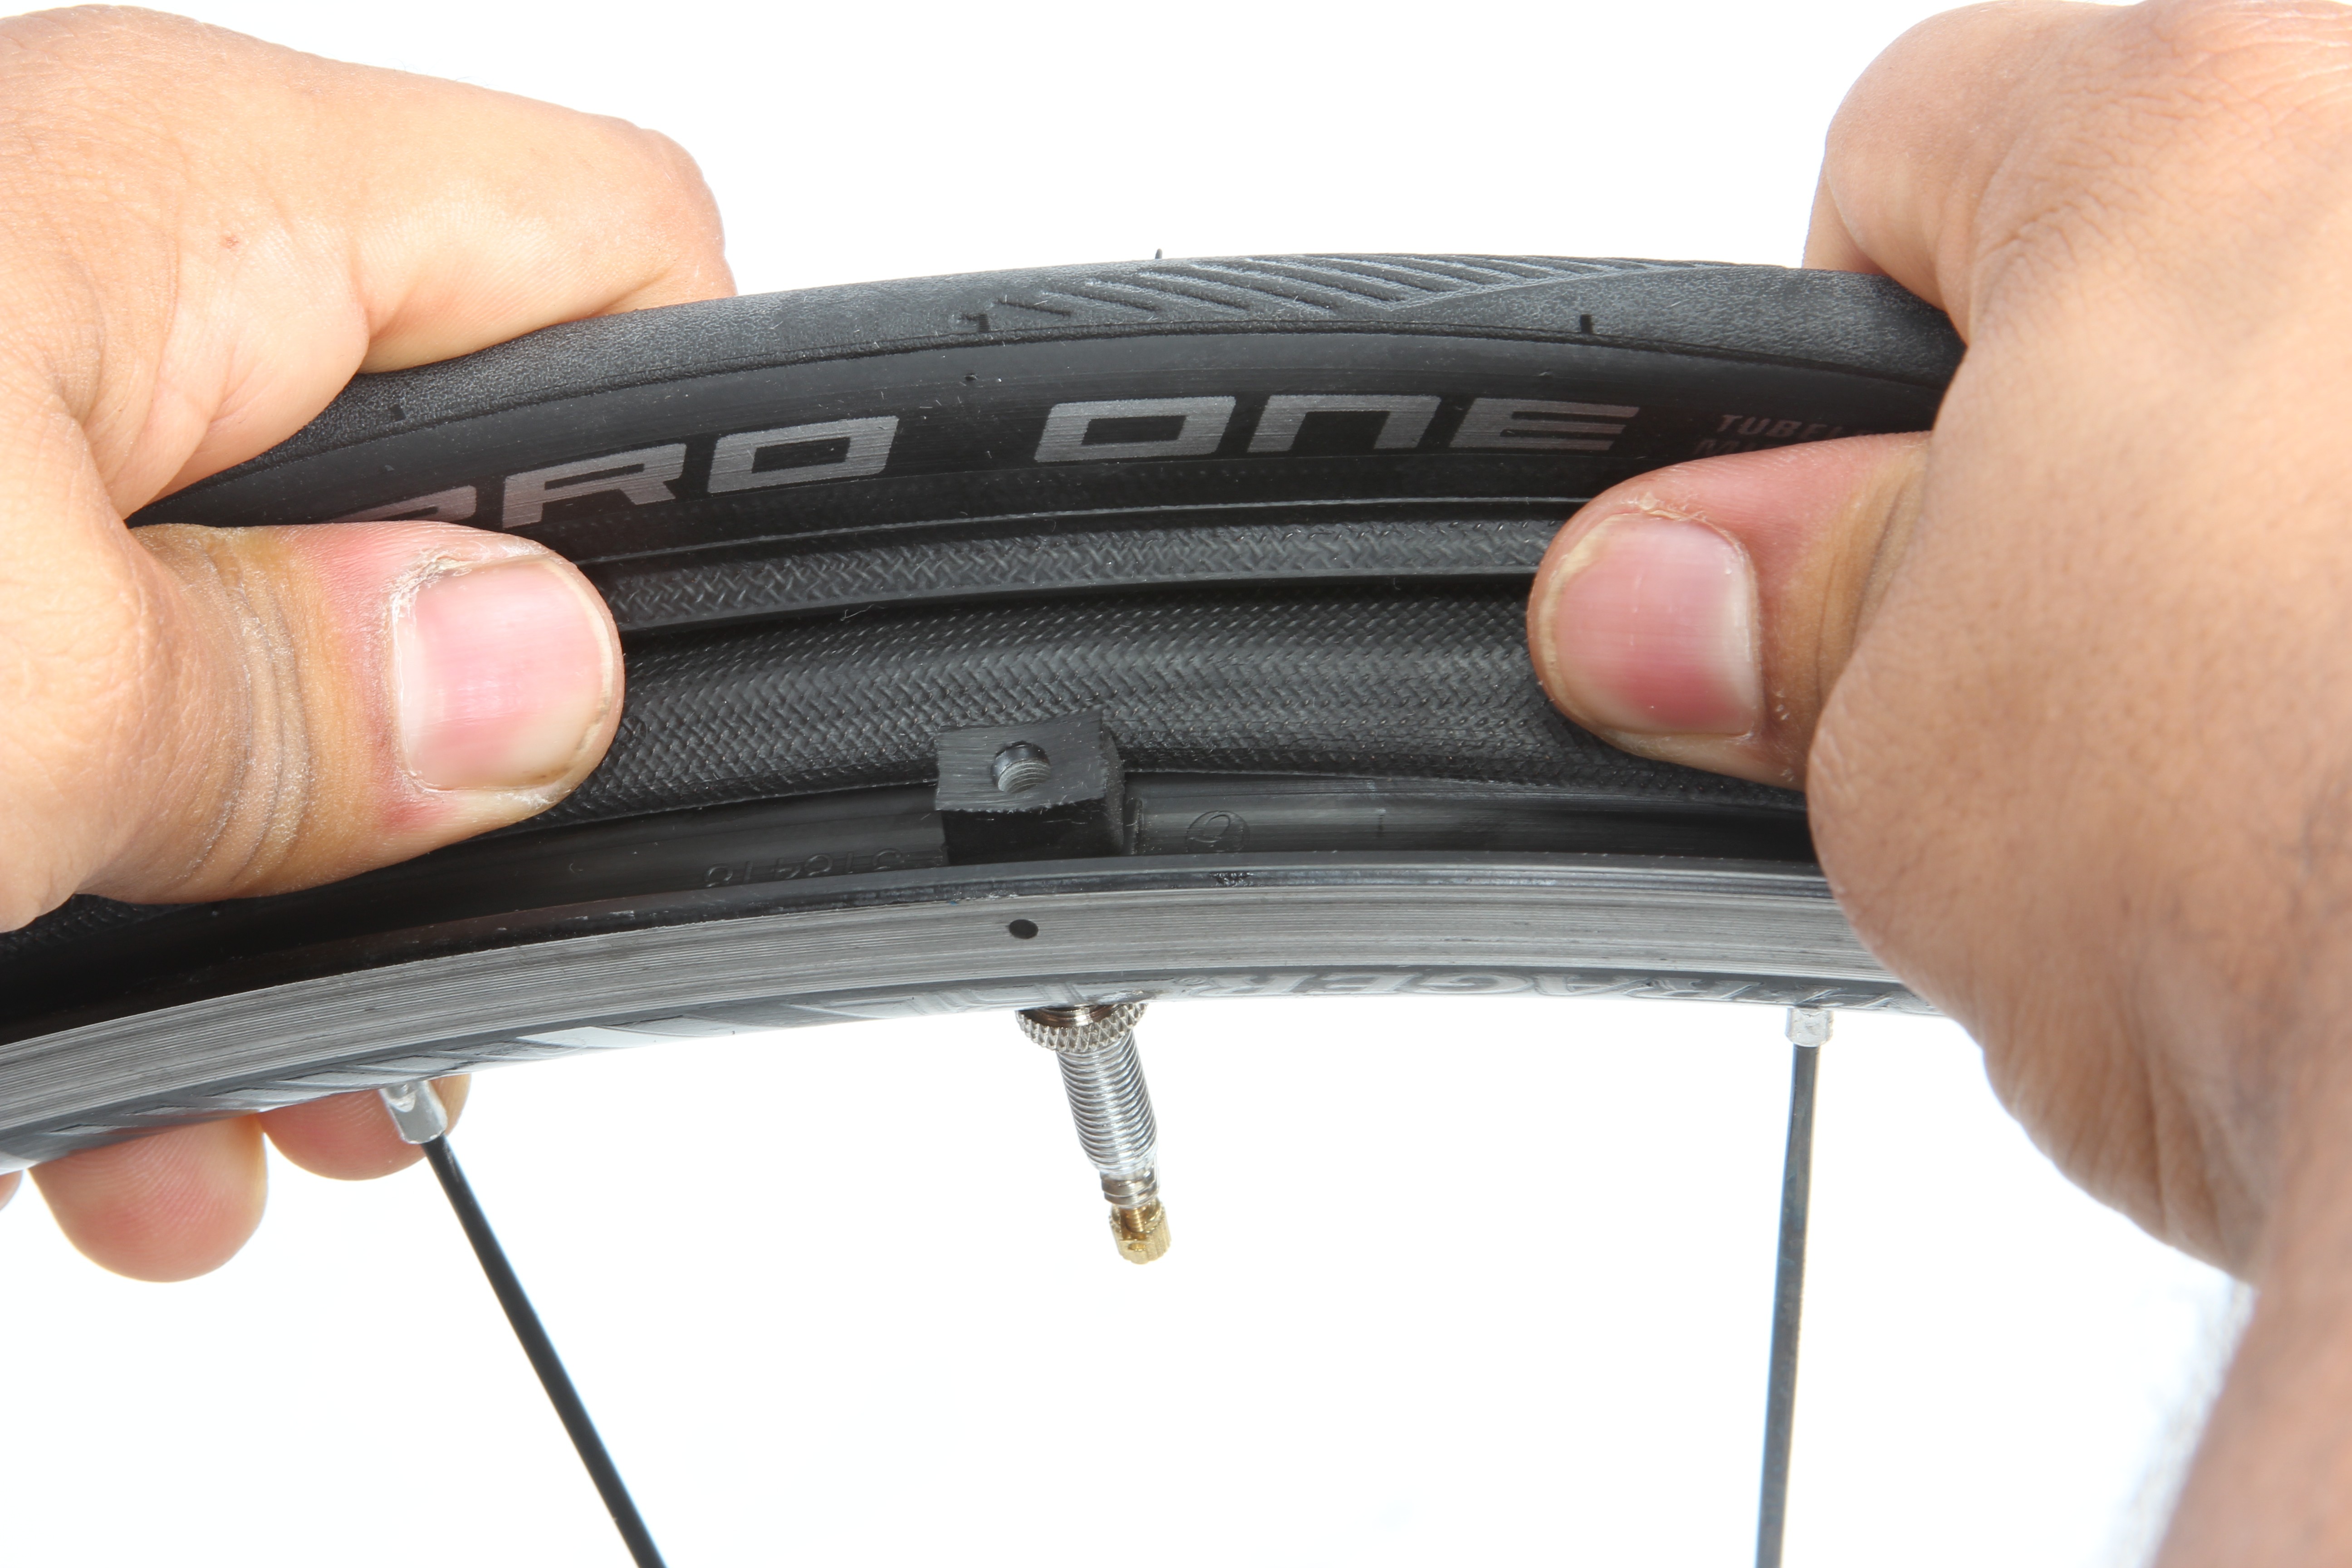
While tubeless tyre systems hold many benefits, they also bring with them a learning curve. The overall layout may be similar to a regular clincher but it introduces a range of idiosyncrasies that will be 
new to many.

Tyre fit is typically tighter and greater care is required to ensure the bead isn’t damaged on installation. The sealant needs topping up periodically and the frequency of this will vary with climatic conditions—hot and dry conditions will lead to more frequent to-ups. These sealant top-ups may add to your maintenance regime but the payback comes when you spend less time fixing punctures on the side of the road!

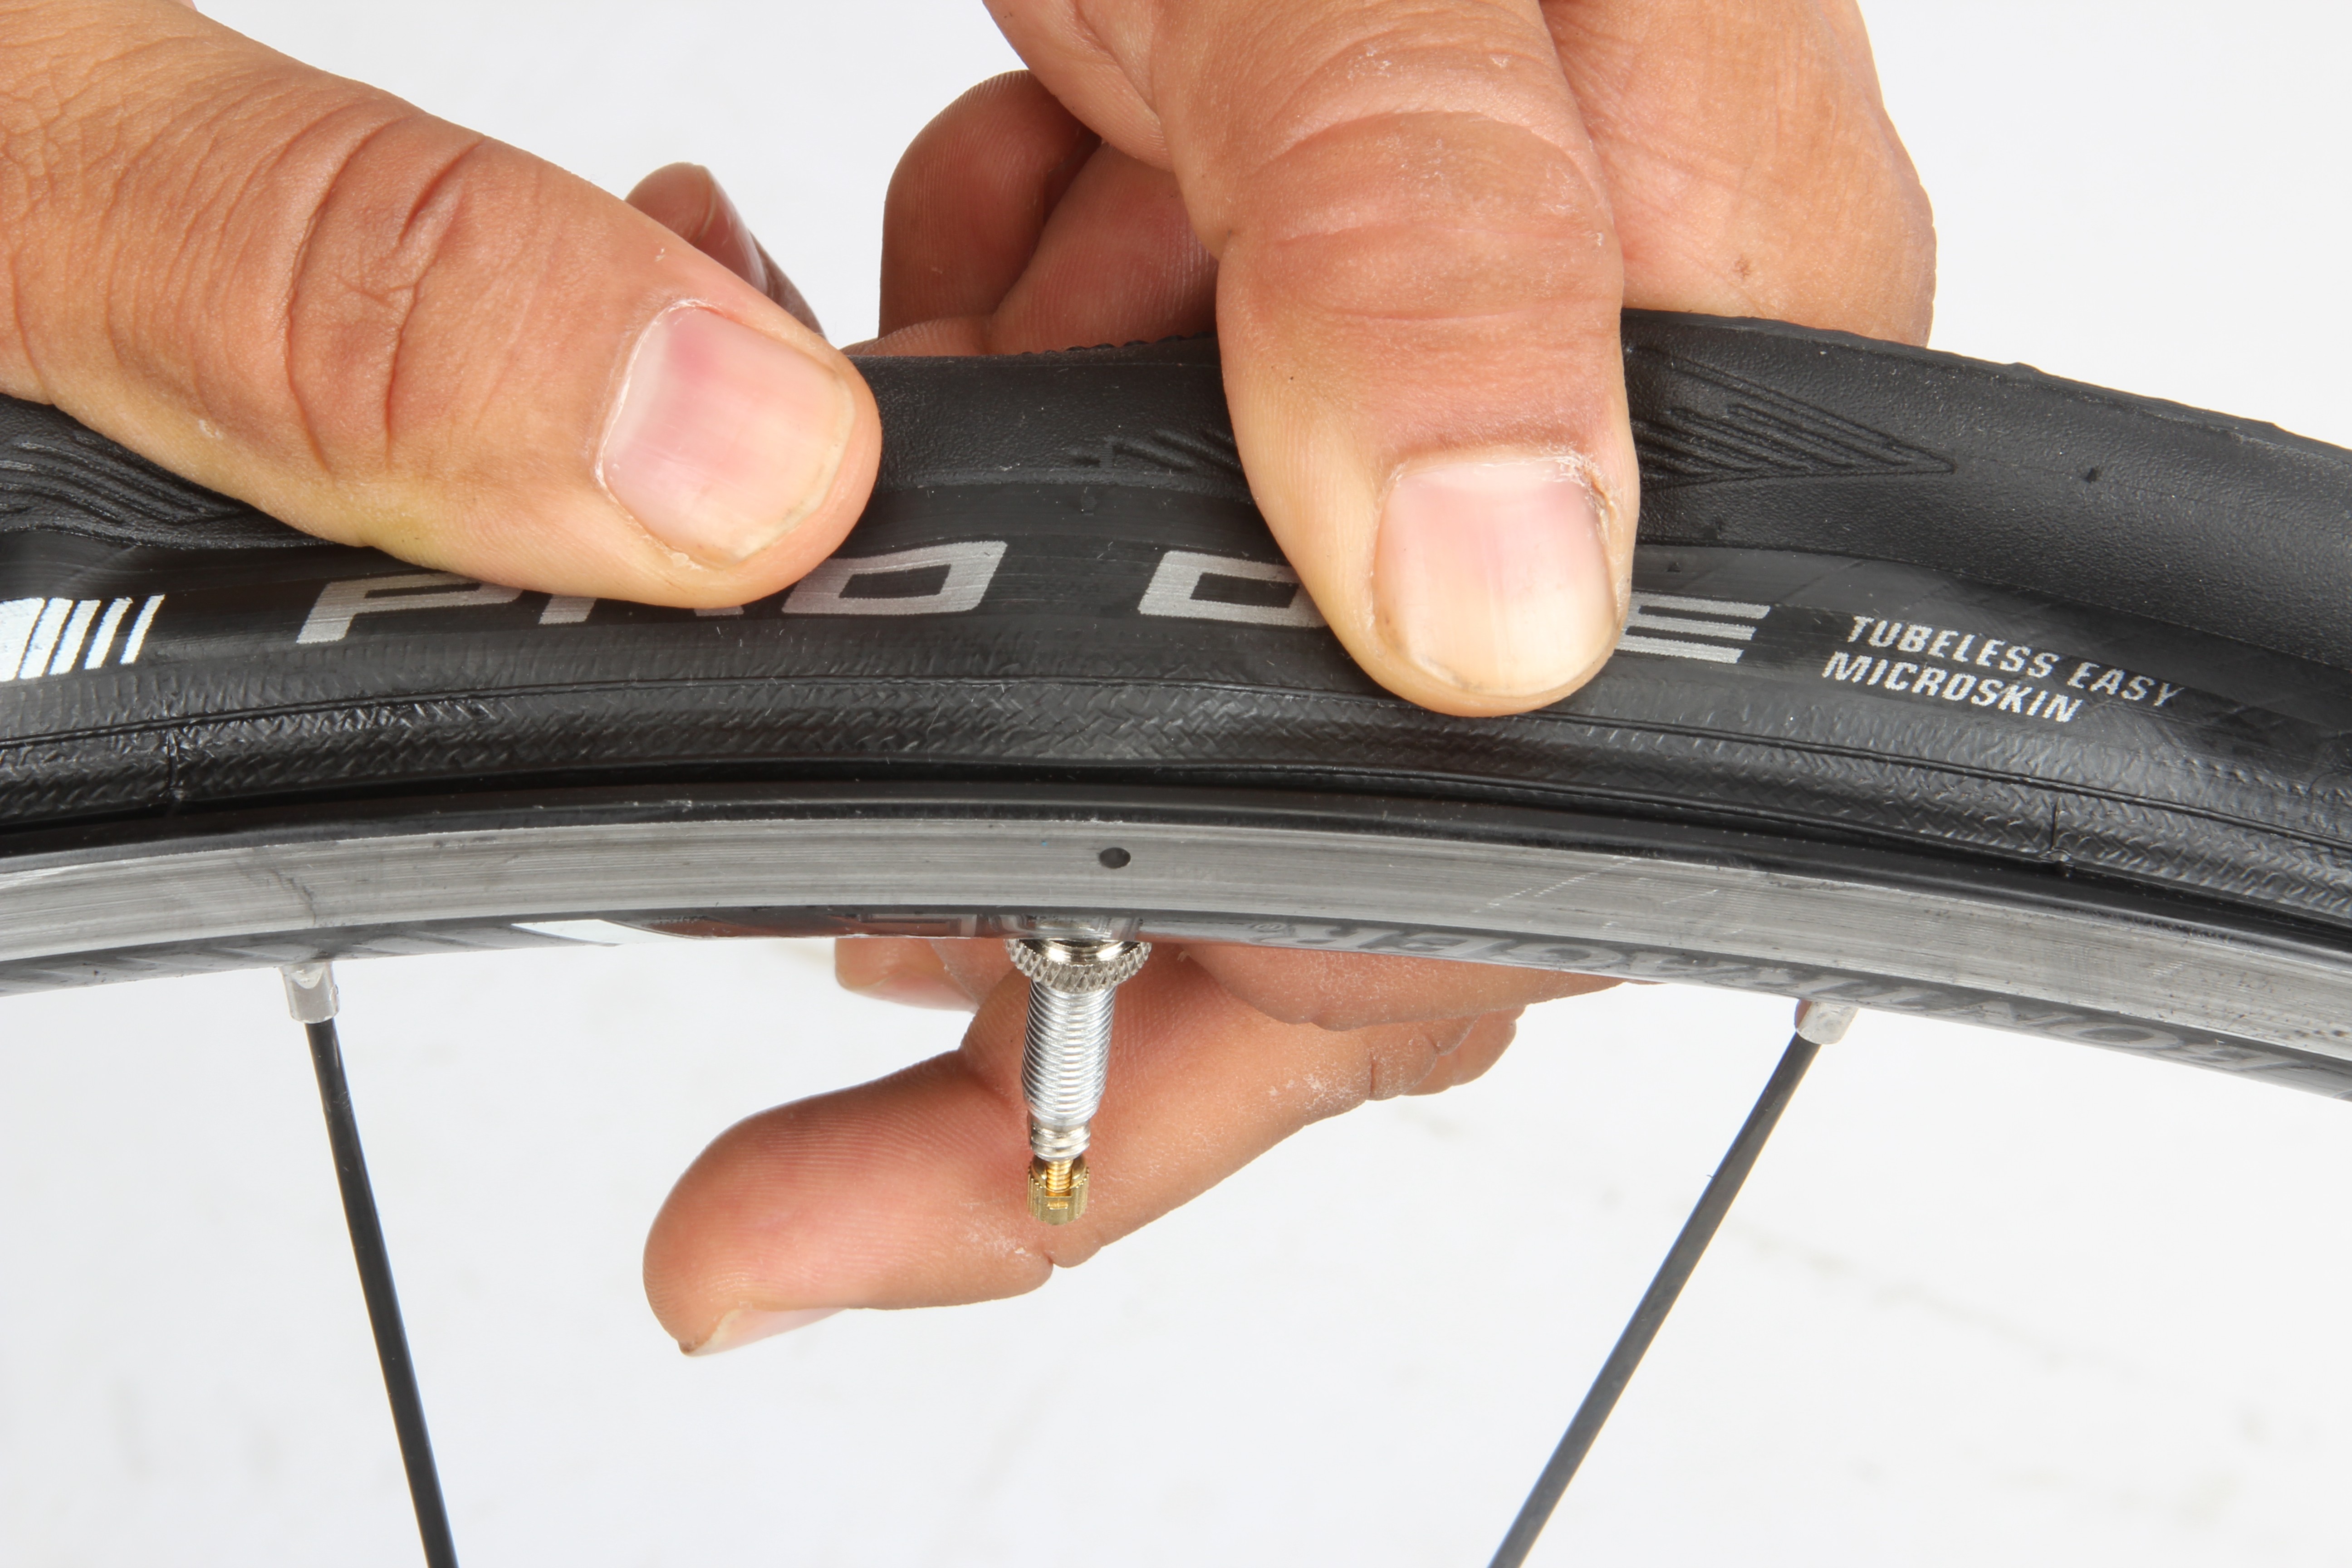
You also need to pay extra attention to the tyre and rim compatibility. With the high air pressures used in road tyres, it’s absolutely critical that the bead mates with the rim as intended. At this stage there’s no industry-wide tubeless standard for manufacturers to adhere to. As a result it’s best to check the information provided by the tyre manufacturer to see if the product is suitable for your wheels and we’d strongly recommend against ‘ghetto tubeless’ setups; that is bodging together rims or tyres that weren’t designed for tubeless applications. For the Pro One Tubeless tyre that we’ve used in our example, Schwalbe recommends a tubeless compatible rim that’s designed to the ETRTO standard with a flange height that’s no less than 6mm (so far as Schwalbe goes this rules out some tubeless rims such as those made by Stan’s No Tubes).

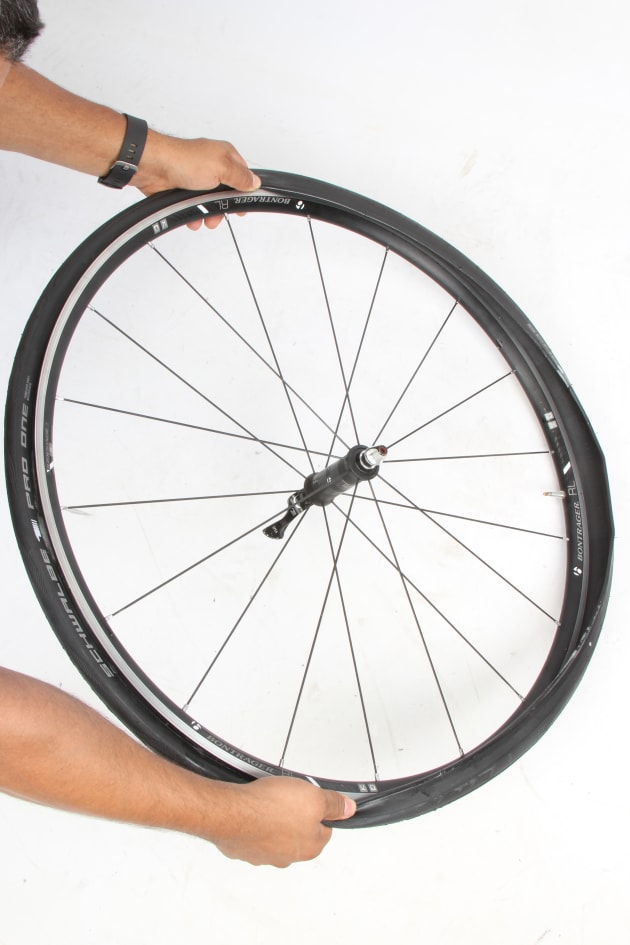
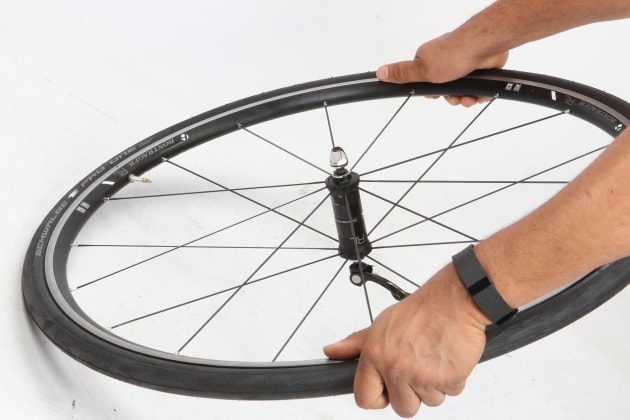
From our perspective, tubeless is clearly the way to go, so let’s take a look at what’s involved in converting to a tube-free setup…
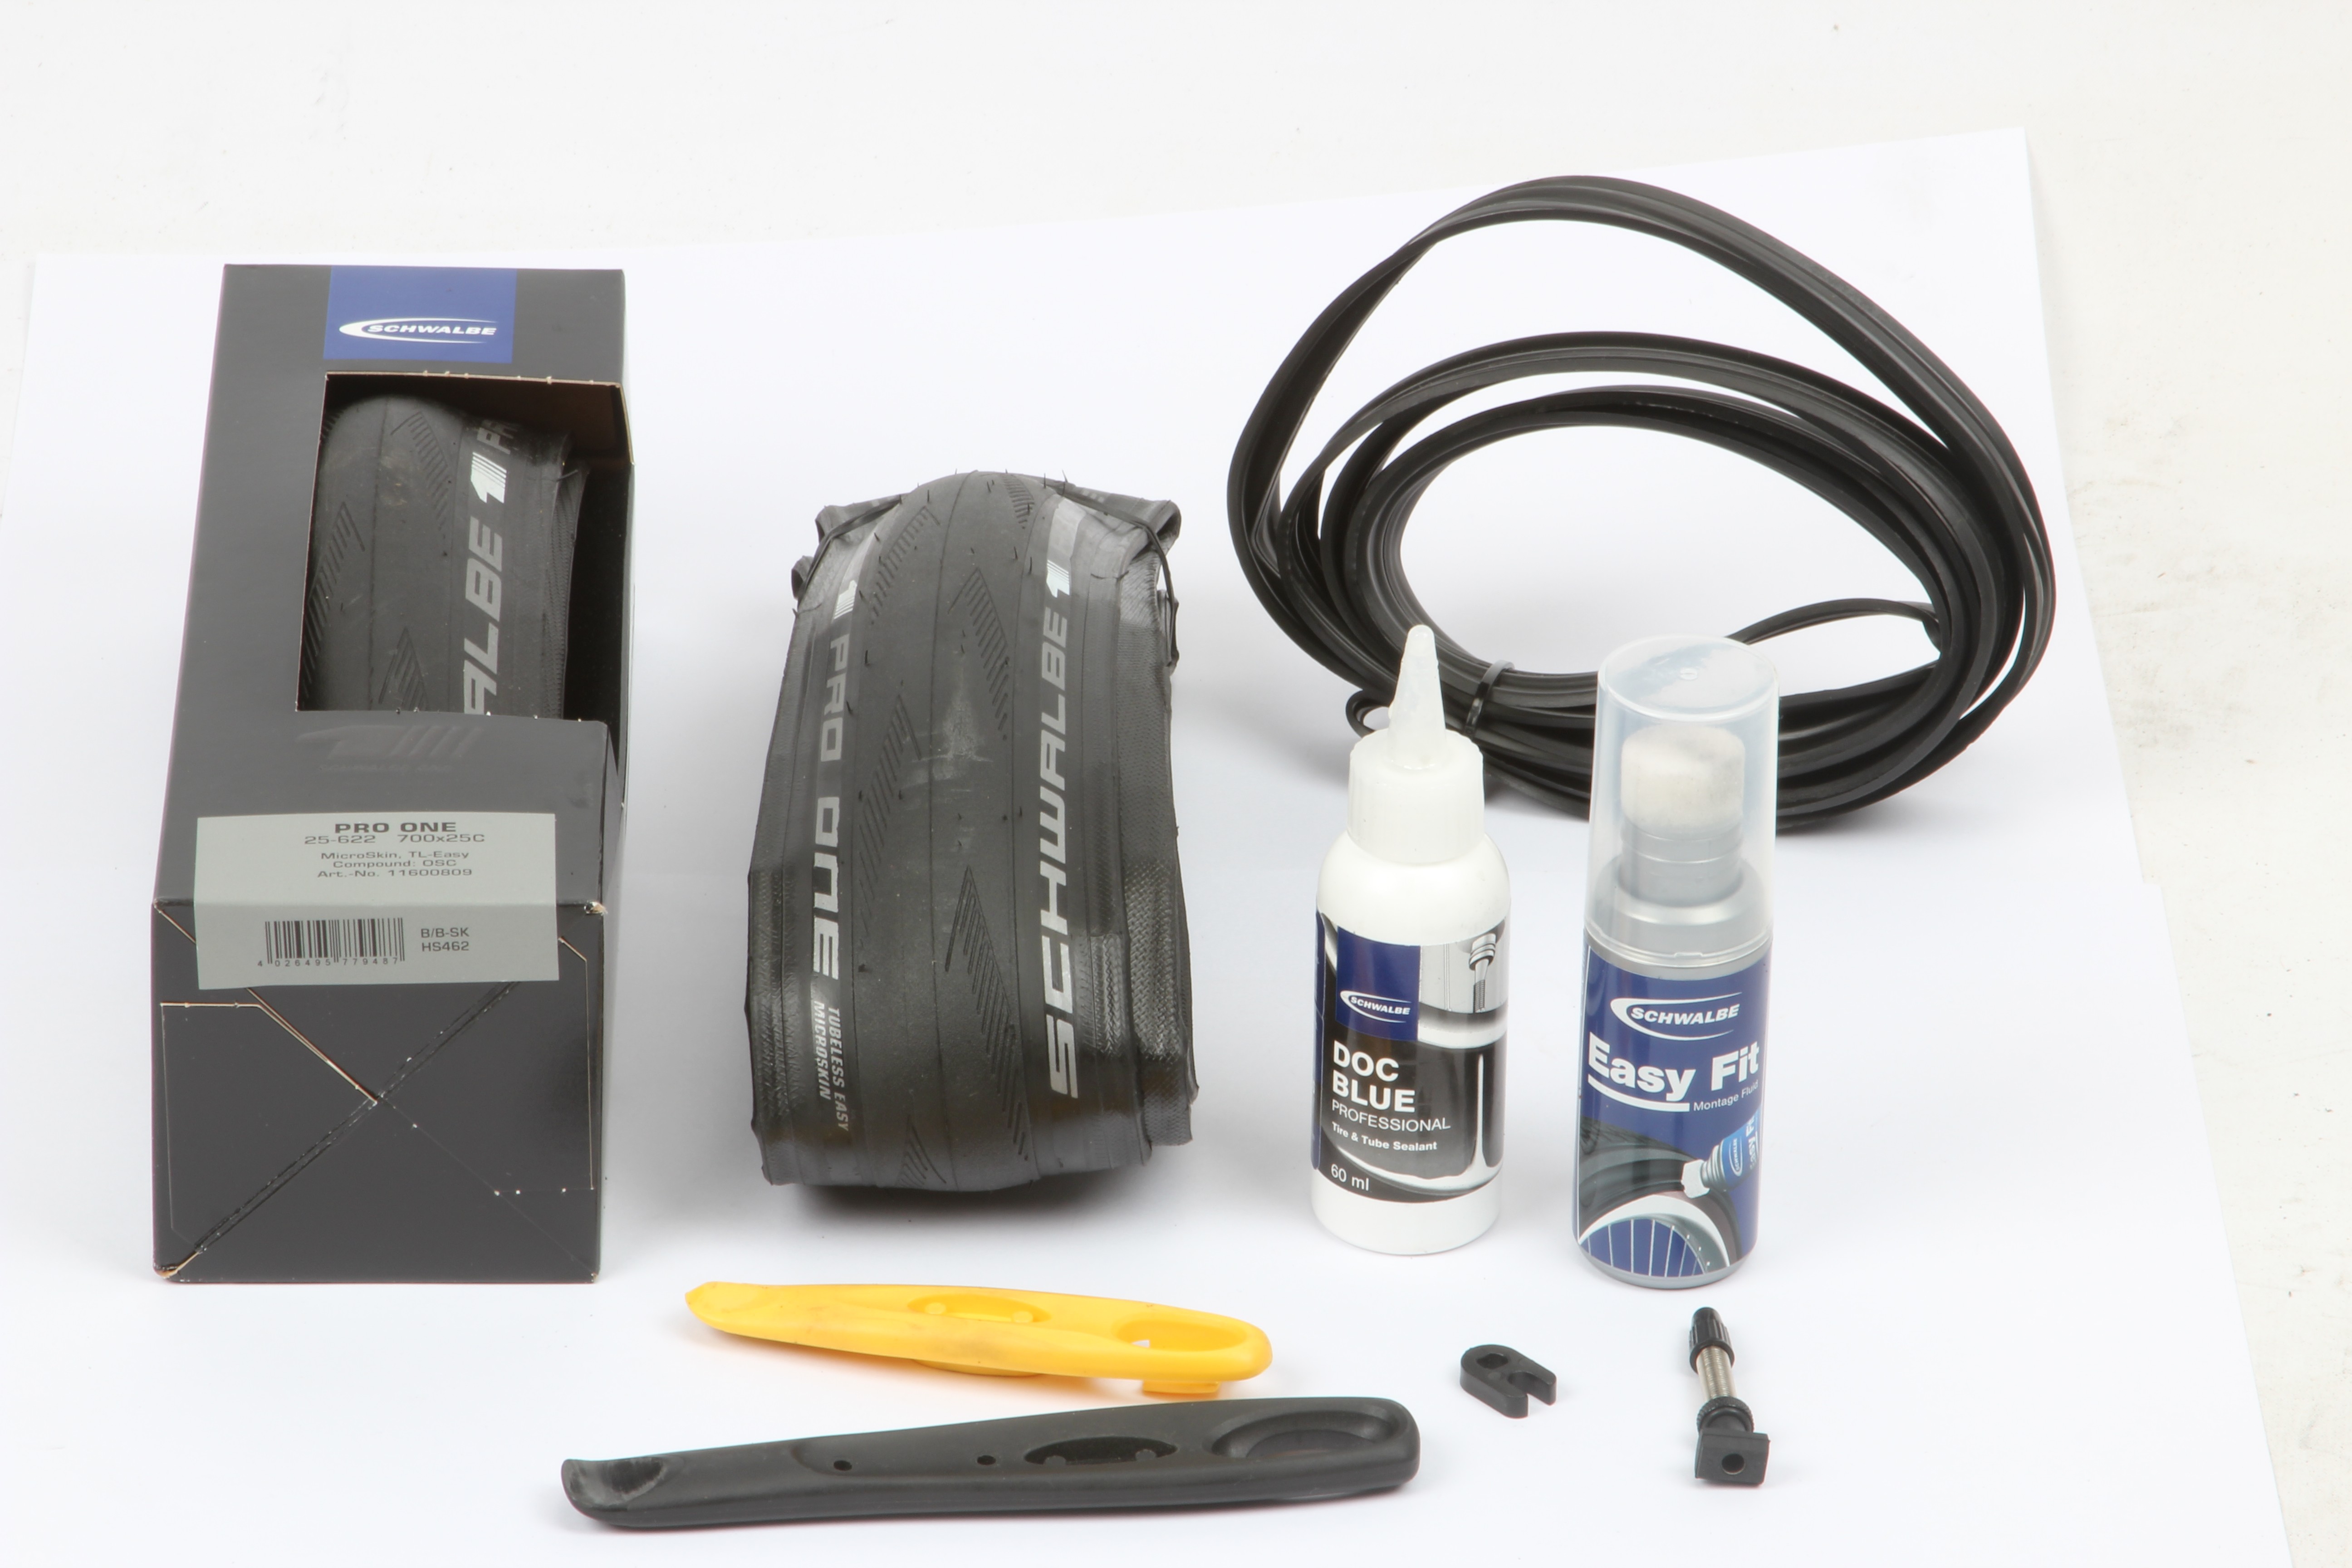
What You Need:
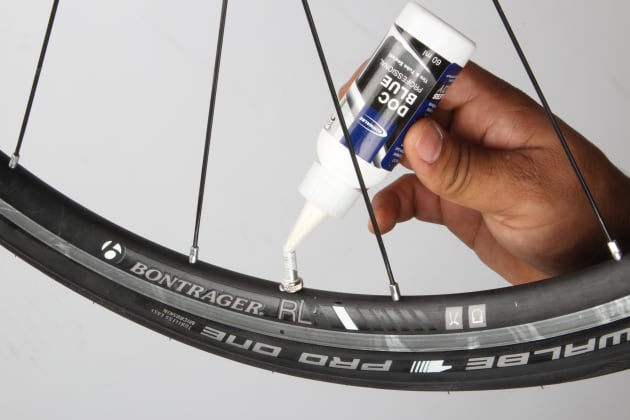
Tubeless tyre sealant.
Tubeless tyres (check
 the manufacturers spec to ensure they are compatible with your rims).
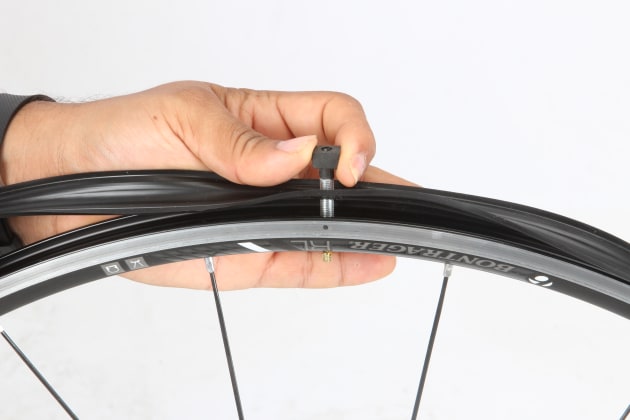
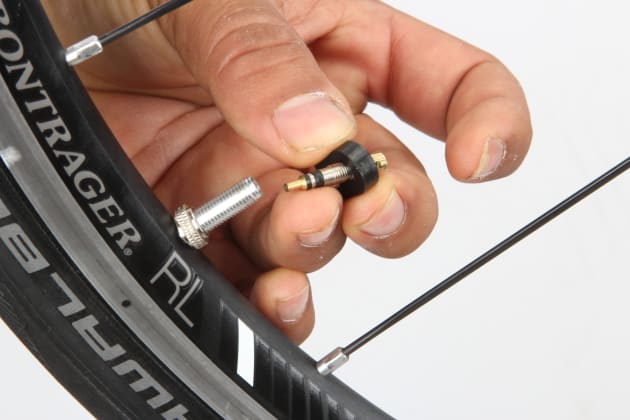
Tubeless valve stems with a rubber grommet to match the inner profile of your rims.
Valve core removal tool.
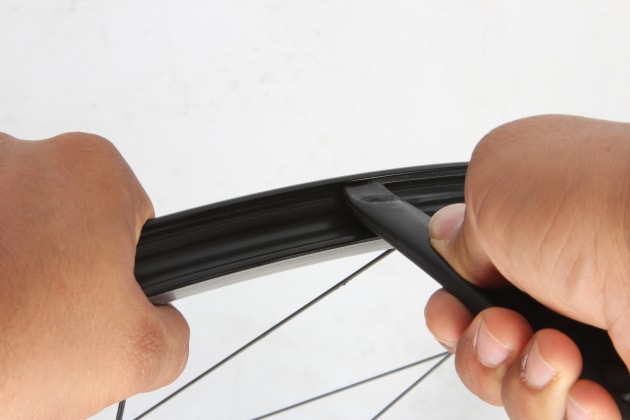
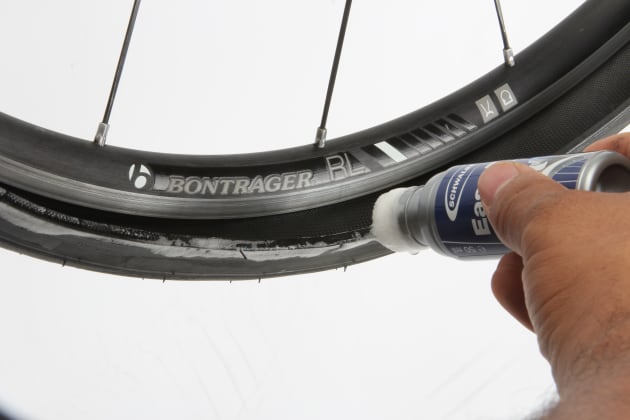
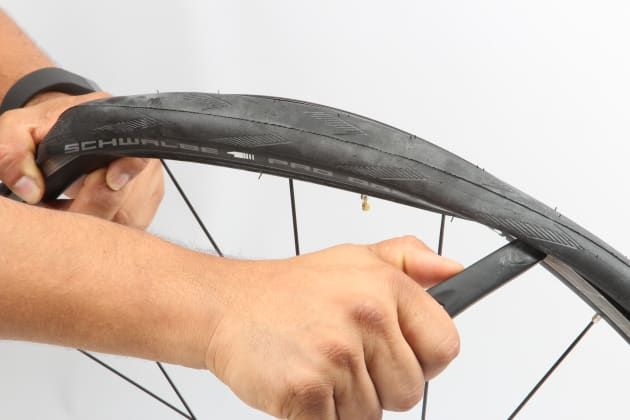
Nylon tyre levers.
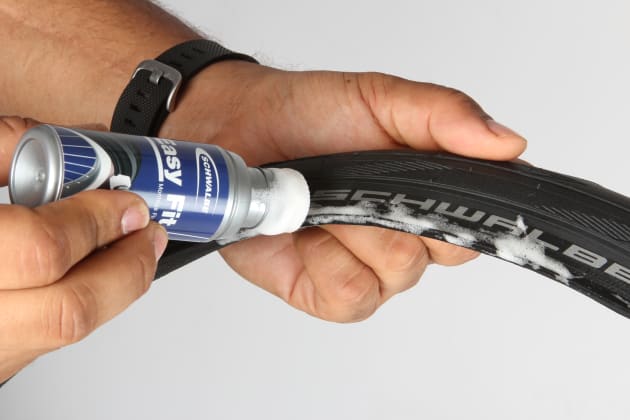
Tyre fitting fluid (Schwalbe 
Easy Fit or soapy water).
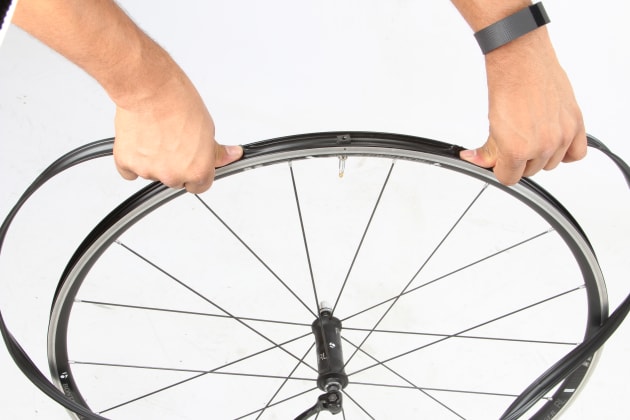
Rim strips/tape or whatever is required to make your rims ‘tubeless ready’.
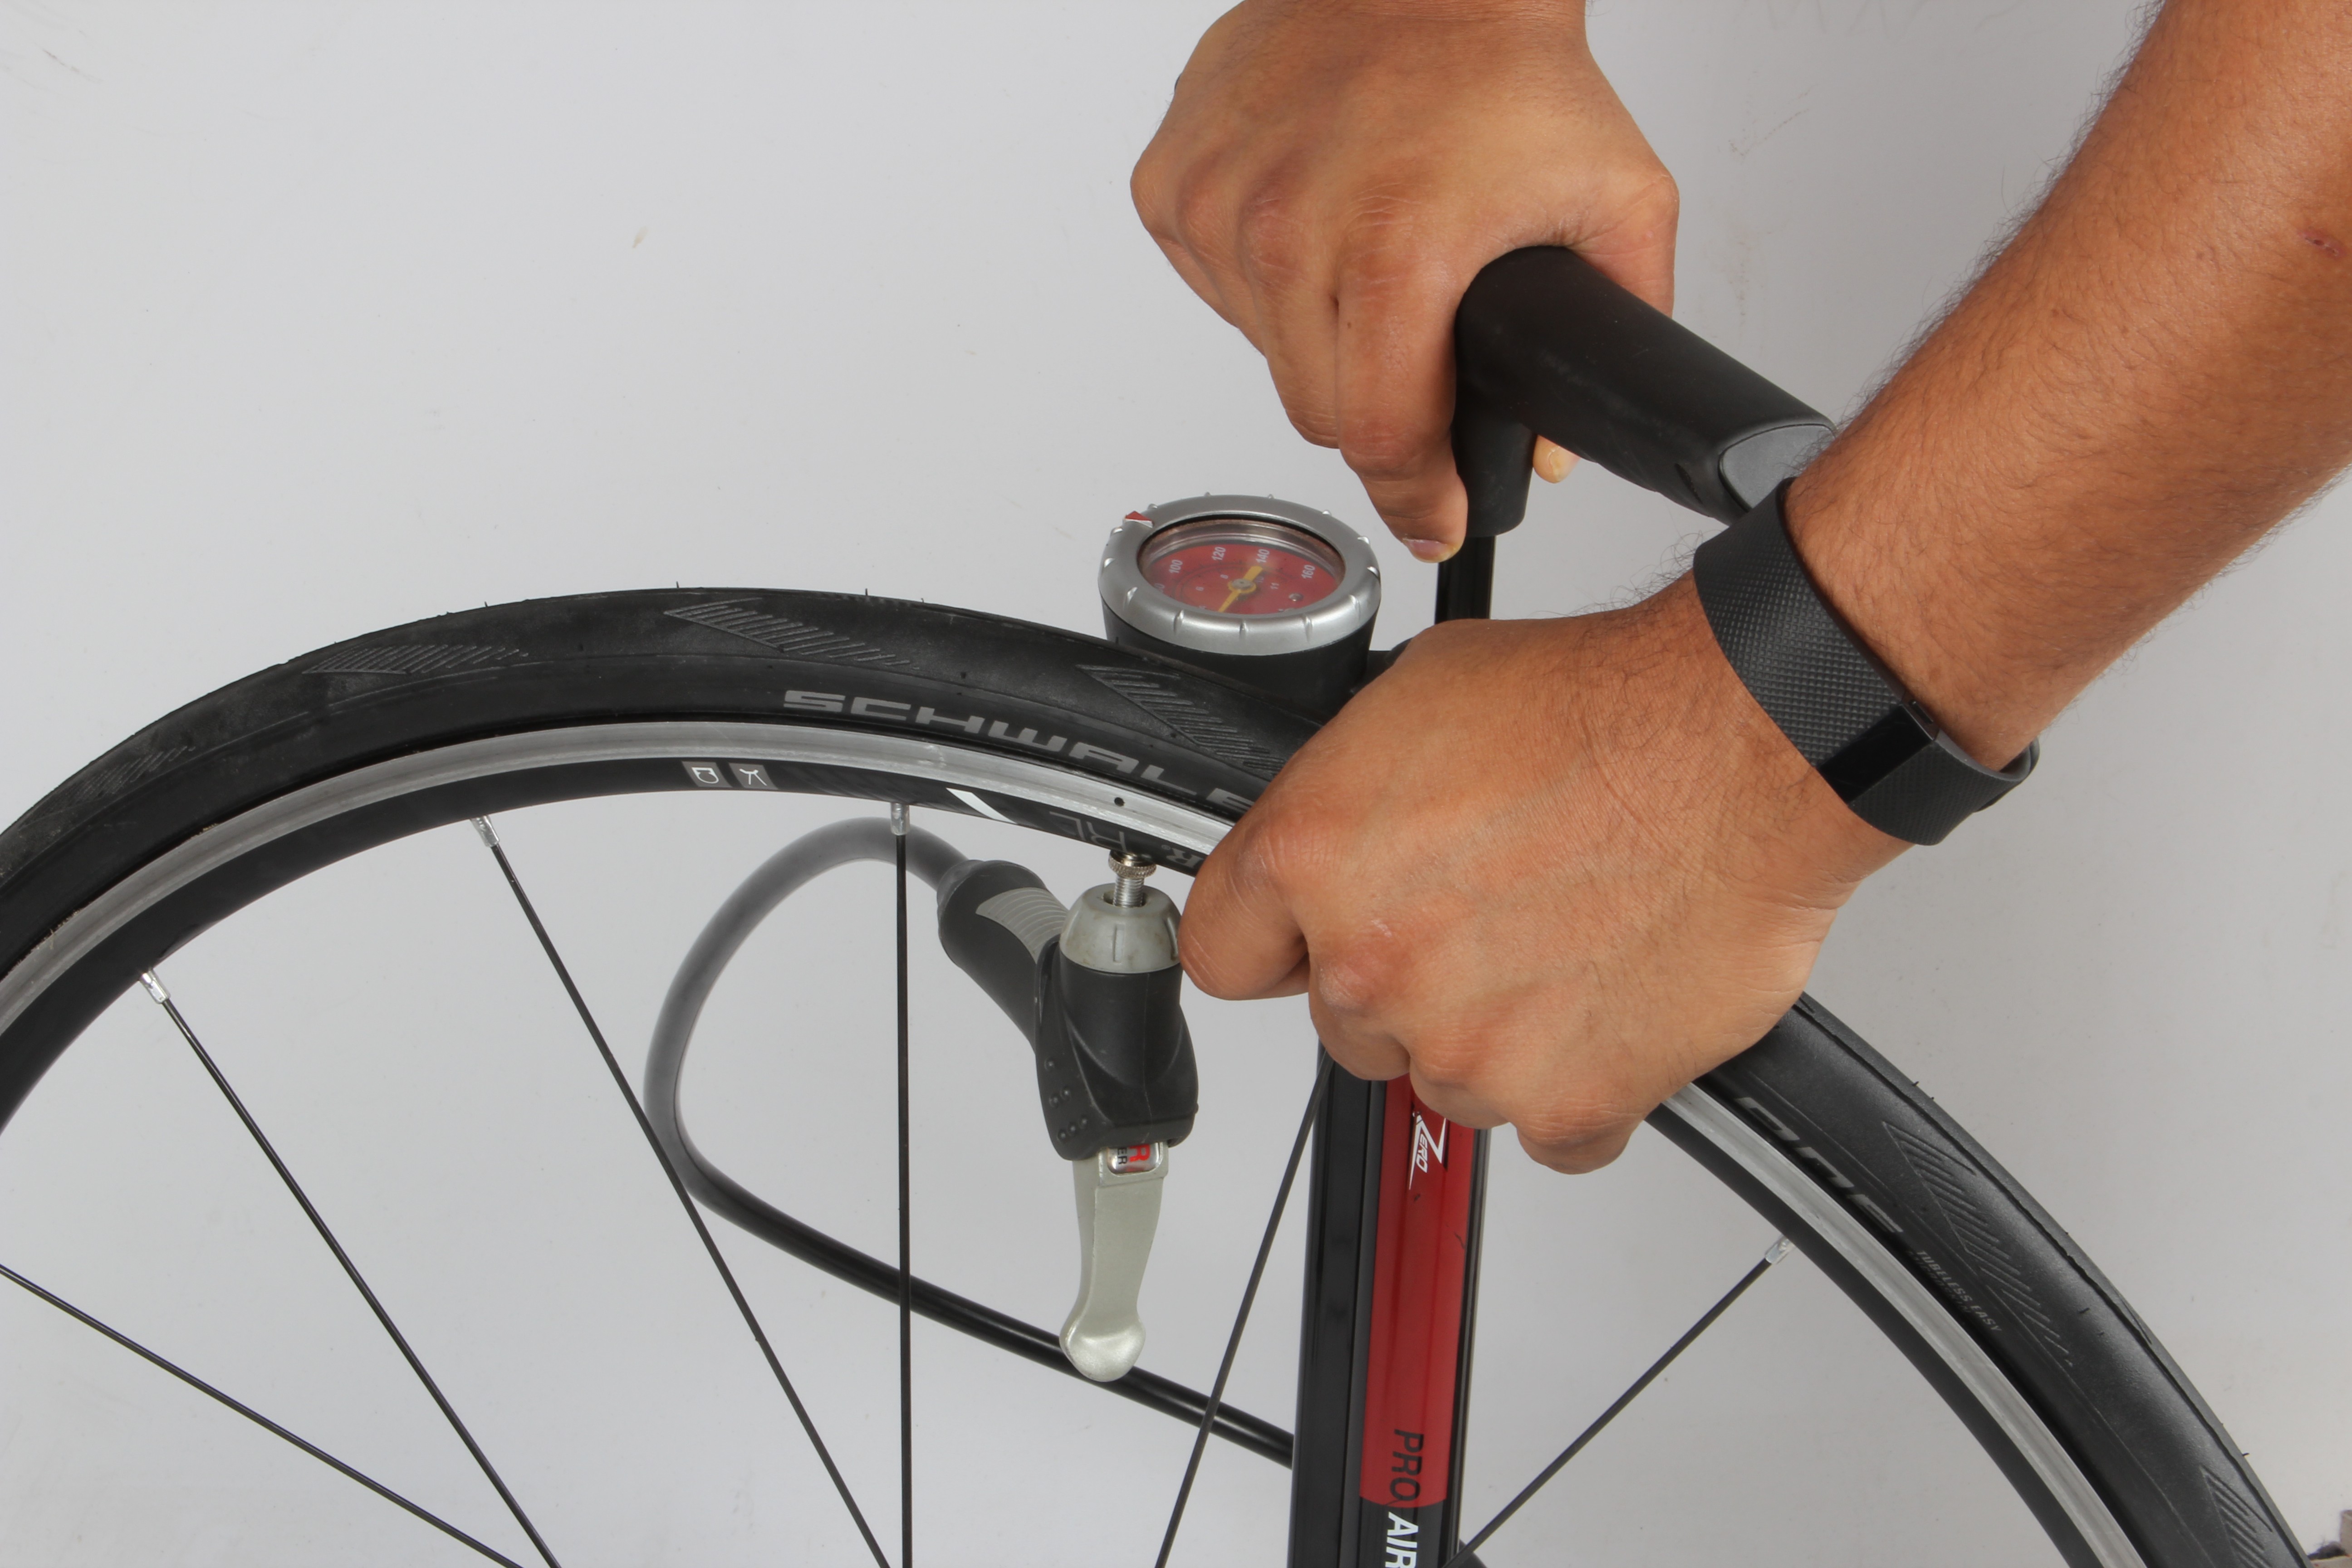
A good floor pump.

Steps for How To:

Consult the instruction manual for your wheels to see what’s required to get the rims ready for tubeless use. For our Bontrager TLR wheels we needed to remove the regular rim strips and fit these moulded plastic strips. They give the inner rim a profile that locks the tyre bead up on a shoulder.
With the valve holding it in place, pull the plastic strip down into the rim bed. Work your way around the wheel pulling evenly on both sides.
Use a nylon tyre lever to push the edges of the strip down at the sides. It should cover the full width of the rim bed and sit down under the bead retaining hook.
Apply some tyre mounting fluid to the bead that you plan to mount first. While this product is designed primarily to help the bead pop into place during inflation, we’ve found that it also helps with getting the beads onto the rim initially, as tubeless tyres can be pretty tight.
Start opposite the valve and slip one side of the tyre onto the rim. Make sure that the bead sits in the lowest or deepest part of the U-shaped rim channel; this will give you the greatest amount of ‘slack’ to work with when pulling the tyre on.
Pop the last section of the bead onto the rim up near the valve. This will require some effort and some rim/tyre combinations will be tighter than others. Ideally you want to get the first bead on by hand but you can use some nylon tyre levers if you have to. If it’s extra tight, double check the bead is at the low spot of the rim cavity and add some more fitting lube. Once the bead is on, push it over to the other side of the valve grommet as pictured.
Lube the next bead up in preparation for mounting. It is possible to add the liquid sealant at this stage but we prefer to inject it via the valve at a later stage. Road tubeless tyres are usually tight fitting and you stand a good chance of spilling the sealant whilst levering the final bead into place.
Once again start opposite the valve and place the bead at the lowest point in the U-shaped rim bed. Push down evenly towards the valve to stretch the tyre on and develop as much slack as possible in the casing.
To get the final part of the tyre on, there’s a 90% or greater chance that you’ll need tyre levers. Make sure they’re nylon (not metal) and free from any sharp edges that could damage the bead. Hold one side of the bead in place with your thumb while you work the other side of the bead on in small sections. Add more tyre fitting lube if required.
Ensure the valve is located between both beads, which are now inside the rim. Give the whole tyre a visual inspection to ensure that it’s sitting evenly on the wheel and pulled into shape—this will help when airing up for the first time.
Attach a floor pump and with a few short hard pumps the tyre should seat and inflate. This step is much easier than setting up MTB tubeless, so you generally won’t need an air compressor. If air is escaping and the tyre isn’t going up, add a little more mounting fluid around the bead and remove the inner valve core to speed the airflow. You can also bring out the big guns and employ an air compressor if required.
Pump the tyre up to around 80psi. You’ll probably hear a number of loud cracks and pops as the bead is pushed up onto the shoulders of the rim—this is entirely normal. Inspect the tyre to ensure that it’s evenly seated on the rim. If it has a wobble, deflate, apply fitting lube to the bead and reinflate. Add more pressure if required until the tyre seats evenly.
Now deflate the tyre and unscrew the inner part of the presta valve (most tubeless valve cores are removable). Using a proper removal tool is less likely to damage the valve but a small shifter will suffice at a pinch.
Using an applicator bottle or syringe, inject the sealant through the valve stem. Check with the sealant manufacturer for the recommended amount but 30ml should suffice for most 25c road tyres.
Refit the valve core and inflate once more—it should go up with ease as the beads will be tightly locked in place on the tubeless rim. Once up to pressure, recheck the tightness of the valve nut as these can loosen when the tyre is fully inflated. Try running 10psi less than you did with inner tubes for a smoother ride.
This final step ensures there are no small leaks around the bead-to-rim junction. Hold the rim at a 45-degree angle with the tyre resting on the ground. Once the sealant has settled towards the bottom of the tyre, give it a bounce and a shake to slosh the sealant against the sidewalls. Now move the tyre around an eighth of a turn and repeat. Do this all the way around on both sides and you’ll be ready to hit the road!


HAVE YOUR SAY

What do you think?

196 Points
Upvote Downvote
Riders will double summit the legendary Stelio pass on May 23, a 227km stage with 5400m of climbing.

Brave, Bold and Daring… Audax Alpine Classic

BCWM401

Gallery: Thousands Ride The Bowral Classic Raising More Than $100K For Charity Along The Way