in

Don’t be That Guy

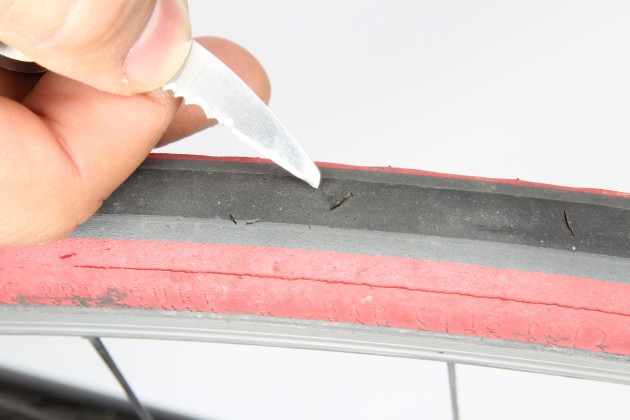
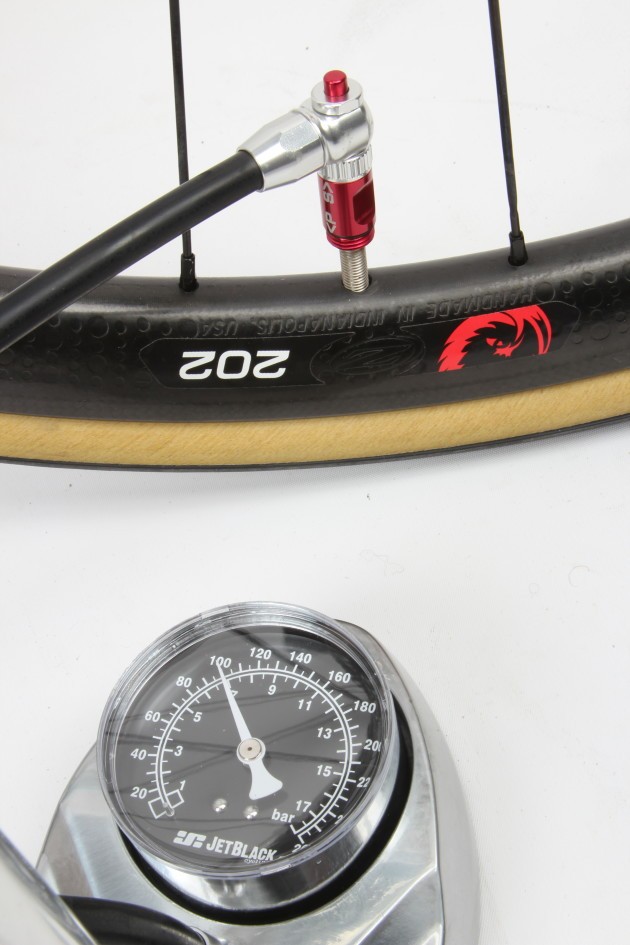
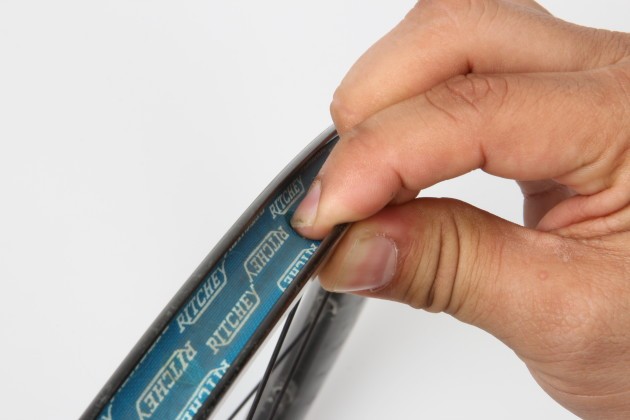
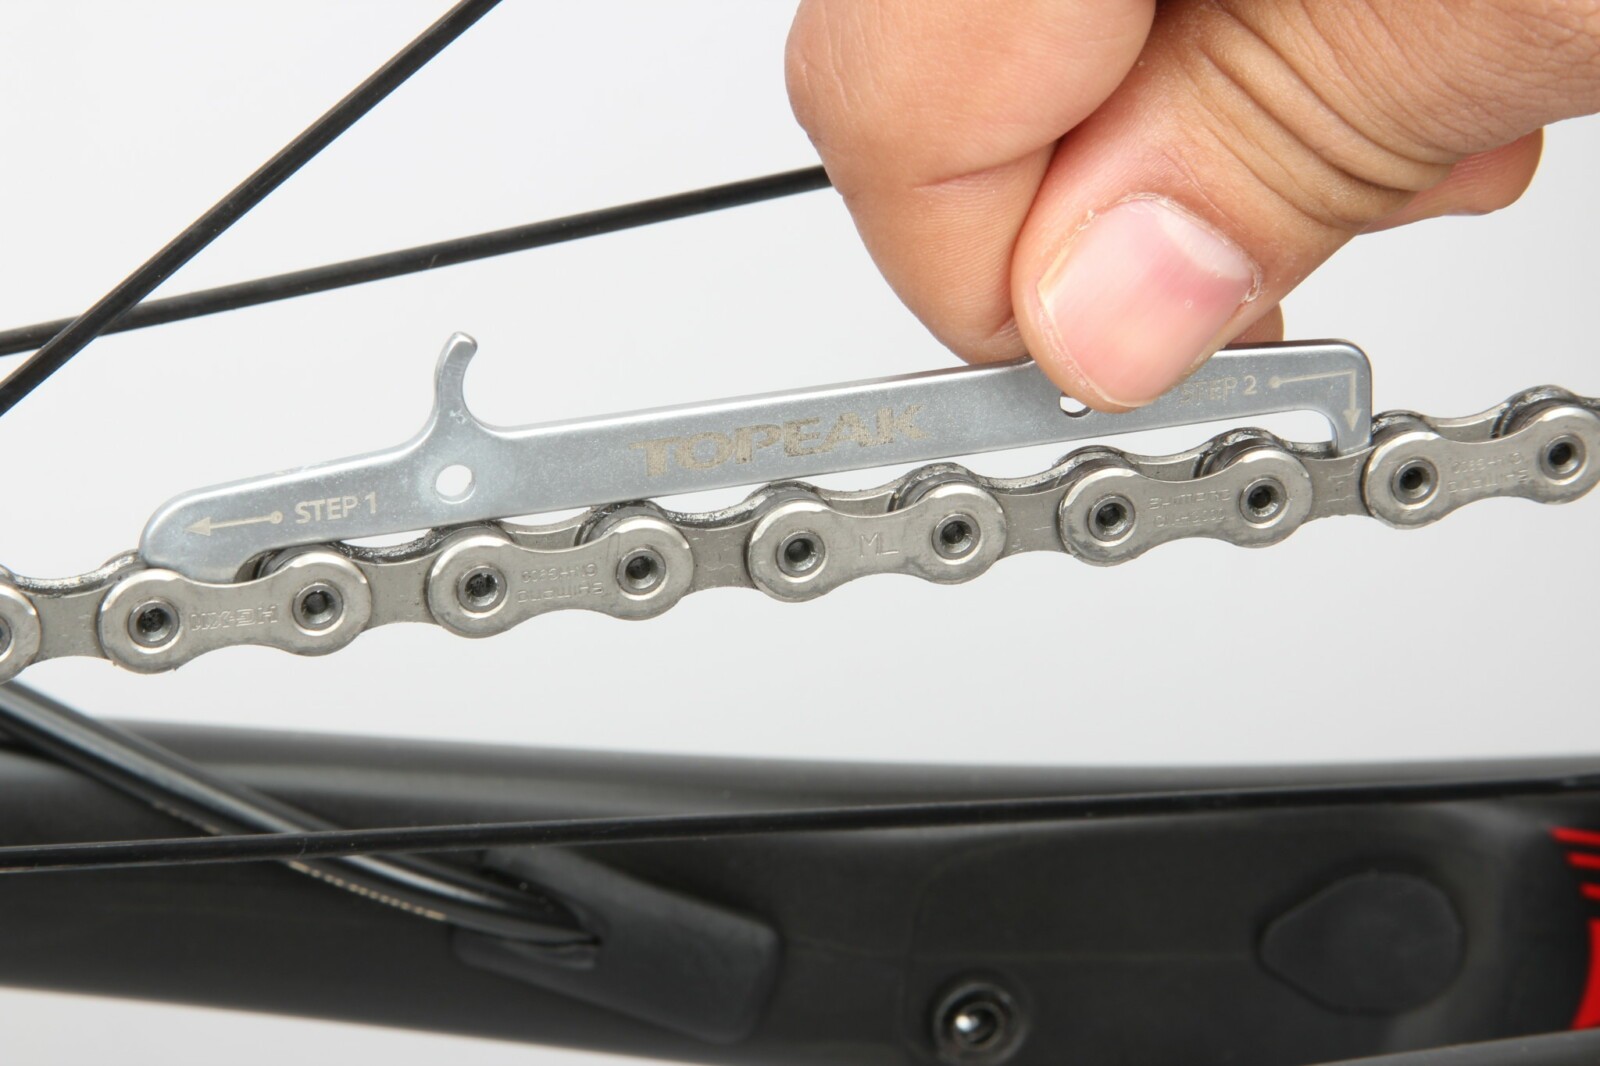
Inspect your tyres closely. If you find any cuts, use a pointed implement to inspect for glass or metal. Don’t get too carried away, just have a gentle dig and feel for anything sharp that could cause repeat punctures. If you have to fix a flat on the ride, always feel around inside the tyre casing and inspect any cuts before refitting the inner tube.
Check your tyre pressures before every ride. While everyone will have preferences depending on their weight, tyre width and road quality, running too much or too little pressure will lead to trouble (from 90-110psi will suit most). Go too low and you’ll leave yourself prone to pinch-flat punctures and rim damage if you hit a pothole. Too much air will increase the risk of penetration punctures from glass, wire and other roadside debris.
Once a year it’s a good idea to check the condition of your rim tape. Damaged rim tape can expose the tube to sharp edges that can cause repeated ‘mystery punctures’. Pay particular attention to the indentations where the air pressure has forced the tape into the spoke holes and look for longitudinal splits if you have plastic rim strips.
Many modern bikes feature internally routed cables, which can complicate routine maintenance. If your bike has external routing with ‘slotted guides’, it’s easy to lubricate the cables if you’re starting to notice extra friction in the system. With the lever in the small-cog position, manually push the derailleur across towards the bigger cogs. The cable becomes slack and you’ll be able to slip it out from the guide. Give the inner wire a wipe and lube then reassemble. This can increase the useable lifespan of your gear cables.
Monitor your drivetrain wear with a chain checker. A worn chain can lead to poor shifting performance and general roughness and inefficiency. If it gets really bad it may fail completely under load, pitching you over the front! Replacing the chain before wear becomes excessive will also extend the life of your cassette and chainrings—items that cost a lot more than the chain.
Wipe your chain and re-lube it after every second ride. Do it after every ride if you’re pedalling in the rain or on gravel roads. This may seem excessive but it’s far easier to wipe and clean before it develops a build-up of road grime. Regular inspection may also help you spot any other issues such as stiff or damaged chain links. If the chain is particularly dirty you can put a bit of degreaser on the rag to help loosen the grime but for day-to-day cleaning there’s no need to douse the chain in degreaser. Always wipe off any excess lube as it will attract dirt and be counterproductive.
If your bike has quick release skewers with an external cam – that means you can see the semi-circular cam mechanism on the outside – you should clean the mechanism every now and then. If the lever action is rough and sticky, apply a drop or two of lube after cleaning. A dry and glitch quick release action won’t clamp the frame/fork tightly and may open unintentionally as a result—a nasty scenario at best.
If you ever crash or drop the bike, always inspect the rear derailleur afterwards. The cage should run straight up and down, lining up with the cogs on the cassette. Slowly turn the pedals over and shift into the biggest cog. Check that you can’t ‘overshift’ and put the chain into the spokes. If this happens the gears need adjusting or the derailleur/hanger is bent.
While some applications can benefit from thread lock, we generally prefer to apply a light smear of grease to most bolts. It helps the threads turn smoothly, prevents seizing and means you’re less likely to wind up with rounded out allen heads on the bike.
With modern lightweight components, it’s really important to tighten any bolts to the correct torque rating. Investing in a torque wrench can make the difference between finishing at the caffe and snapping a handlebar because the stem was over-tightened!
Usually unseen and often forgotten; periodically inspect your cleats for wear—especially if you do a bit of walking in your road shoes. Damaged cleats can cause you to unclip unintentionally and the results will be painful if it happens at full-noise when going for the group ride preme.
A stuck seatpost won’t hold up the bunch ride but one that constantly creeps down may. To avoid both scenarios, apply a light coat of grip paste to your seatpost. This is a grease that contains fine granules that prevent handlebars and seatposts slipping without the need for excessive clamping force. It’s sometimes referred to as ‘carbon assembly paste’ but it can be used with other materials too. As an added bonus, it also helps to prevent corrosion and can stop a metal post getting stuck in the seat tube.
Like any good boy scout (or guide) it pays to be prepared. Saddle bags may be uncool in the pro-peloton but you’ll appreciate that these essentials are always with you on every ride. Set yourself up with a tube, puncture repair kit (in case you get more than one flat), tyre levers, a compact tool and always carry a pump. You may get by with a Co2 inflator but you’ll be stuck if you puncture again. Also consider carrying a bit of money (never know when you’ll bonk) and a valve extender if you’ve got deep rims (just in case you need to borrow an inner tube).
If you ever drive to your ride start-point, it’s worth stowing a spare helmet, shoes and bottle in the car. Few things make you feel more silly than getting up before dawn and driving some distance, only to find your riding gear is still at home—I know this from experience!
Disc brakes are coming and with them comes a host of extra things to be aware of. If you’re an early adopter, make sure that you never get any oil on the rotors or pads. If a splash inadvertently lands on them, wipe them thoroughly with disk brake cleaner and a clean rag. Once contaminated, the pads will be a throw away item, so take care when lubing the chain or quick release skewers.
Another point for hydraulic disc brake users; place a pad spacer in the calliper when the wheel is removed and you’re transporting the bike. This ensures that the pistons won’t overextend if the brake lever is pulled inadvertently.

HAVE YOUR SAY

What do you think?

196 Points
Upvote Downvote

Quick-Release Safety Recall

Another point for hydraulic disc brake users; place a pad spacer in the calliper when the wheel is removed and you’re transporting the bike. This ensures that the pistons won’t overextend if the brake lever is pulled inadvertently.

1.HC Classification confirmed for Cadel Evans Great Ocean Road Race