The best time to stretch is immediately after a ride, however within the hour is still good. The previous stretching article detailed stretches to do within this time window. However, many of us have busy lives that do not allow us the luxury of time after a ride, whether it be kids, work or just life, something always gets in the way.
You can however still get the benefits of working on your flexibility in the evening whether it is after a ride or on a rest day. Stretching in front of the TV is a great time to incorporate some quality ‘athlete preservation time’ as I like to call it. From my own experience, I have to make sure the TV program isn’t too gripping, or I spend my time craning my head to watch what is happening rather than positioning myself correctly! So choose your TV program wisely and you will be able to do a good job.
How often should you stretch?
Perform these stretches at least 2–3 times per week. In an ideal world, 5–7 days per week, but don’t stress too much if your lifestyle doesn’t allow that time commitment. Something is better than nothing.
How far should you stretch?
Stretch to the limit of movement, not the point of pain. If pain is felt, then back of the stretch a little.
How should you breathe?
Keep the breathing slow and rhythmic while holding stretches. Exhale slowly as you extend to the endpoint of the stretch. As you exhale, the diaphragm muscles relax thus promoting a more effective relaxation of the target muscles.
The stretches shown below require only a rolled up towel as a prop, however a foam roller is a great addition to any athletes’ box of tricks. It can be used in the stretches shown below in place of the towel.
The rolled up towel is a good prop to start with, especially if you are quite tight in the chest/back/shoulders. As you loosen up in those areas you may find that you cannot obtain enough of a stretch using a towel, then it would be time to progress to the foam roller.
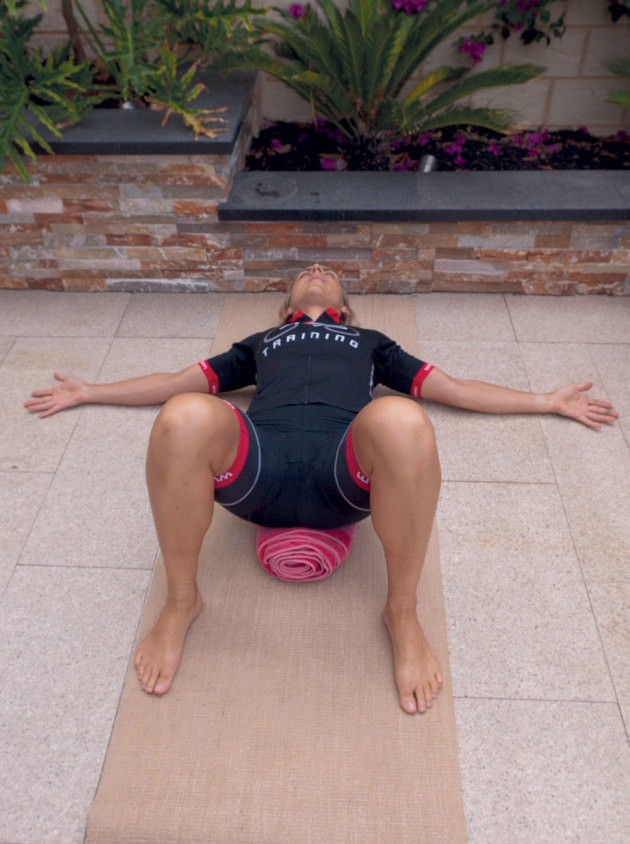
1. Chest opener
This is a passive stretch designed to let your chest progressively stretch.
• Sit down on one end of the foam roller/rolled up towel. Your feet should be flat on the floor and knees bent.
• Using your hands on the floor to guide you, slowly lower yourself down on to your back until your spine is balanced on the roller/towel. Your tailbone and head should both be supported.
• Keeping the spine in contact with the roller/towel bring your arms to the side of your body with your palms facing up.
• You should feel a stretch in your chest, if not, then move the arms up so they are at a 90 degree angle to the body. Let you arms melt in to the floor. Do not force them down.
• Stay in this position for 1 minute initially, working your way up to 5 minutes.

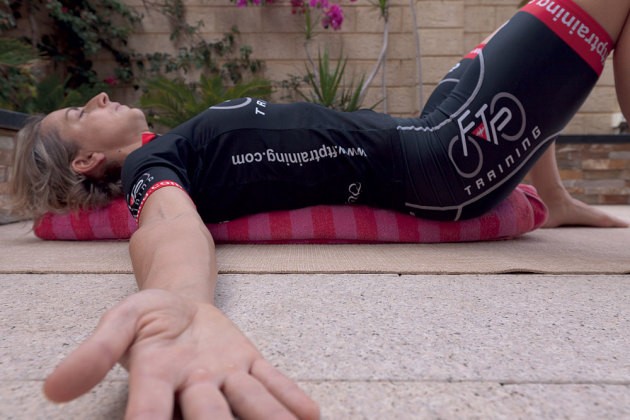
2. Thoracic spine mobility
The thoracic spine comprises the 12 vertebrae that are connected to and occupy the same level in the body as the ribs.
The objective of this movement is to relax the spine over the towel to get some mobility in the vertebral joints of the upper spine.
• Lie back on a foam roller (a rolled up yoga mat or towel can work as well) with the roller placed just below the shoulder blades.
• With knees bent and feet flat on the floor, place your hands behind your head, bring your elbows together.
• On the inhale, curl back over the roller/towel, focusing on relaxing your spine over the rolled up roller/towel.
• On the exhale, knit the ribs together as you curl up and draw elbows together.
• With each successive breath, see if you can find more ease and expansiveness as you coordinate movement with breath.
• Repeat 4-5 times.
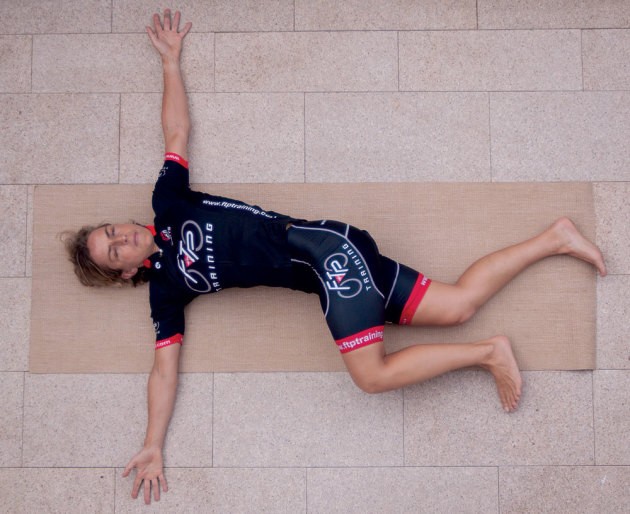
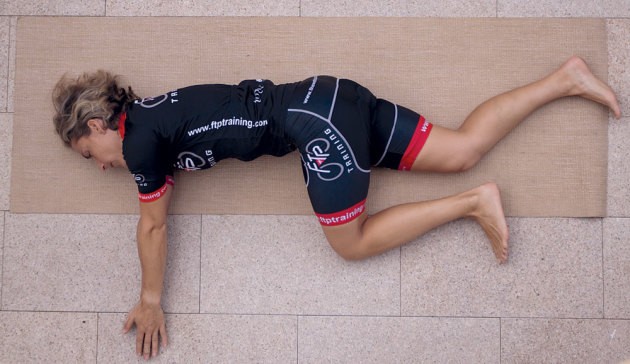
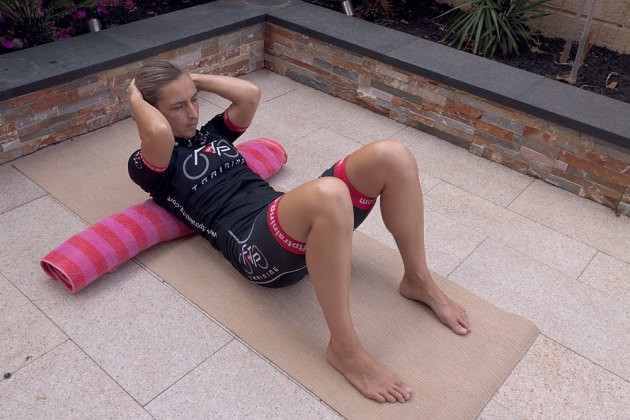
3. Thoracic spine twist
The thoracic spine is the segment of the spine that we should be using for twisting. The lumbar (lower) spine has a maximum rotation of only 5-10%, whereas the thoracic spine has a maximum rotation of 35%, and the neck 50%.
• Lie on your right side with your left knee bent about 90 degrees.
• If you left knee cannot easily rest on the floor in this position, then place a towel/cushion under the left knee for support.
• Your are arms are at shoulder height resting on the ground on your right side with palms together – this is the starting position.
• The movement starts by sliding your left hand along your right arm, slowly opening the shoulders and rotating through the lumbar spine until your left is arm on the left side of your body at shoulder height.
• If you are quite flexible then your left arm will be flat on the ground, if your arm does not get that far, then do not force it, with practice will come greater mobility.
• Tense your abdominal muscles in order to help keep your lumbar spine from rotating, and press your right knee into the ground to help stabilize your hips.
• You should feel the rotation in your chest and upper back.
• Reverse this movement to get back to the start.
• Do ten rotations on each side, holding for a couple seconds at the end of each rep.
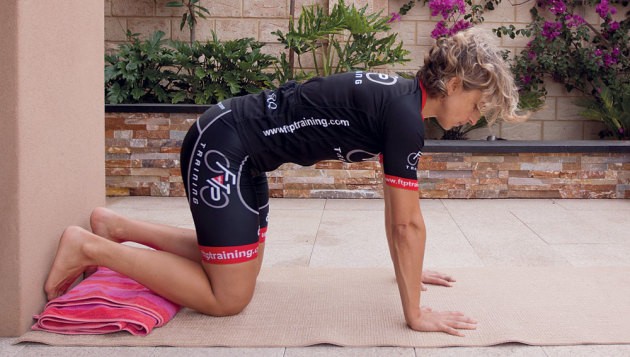
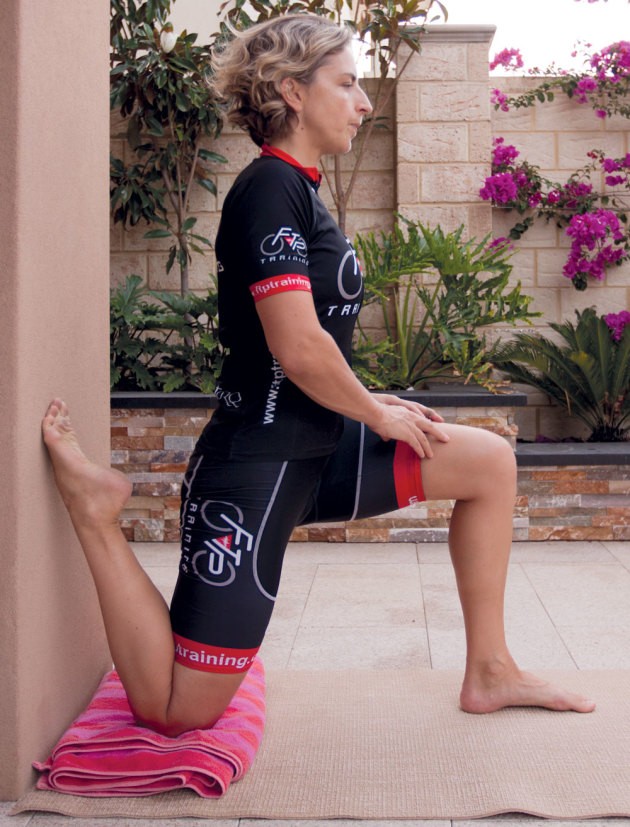
4. Couch stretch
This targets the quads and hip flexors. It helps undo the damage from sitting on your bike all day, and the damage from sitting at a desk all day.
This stretch can be done next to a wall or next to the front of the couch – hence the name.
• Place a mat or folded towel next to the wall.
• Start on all fours with your feet against the wall.
• Raise your right leg so your knee is on the mat or towel and your shin and foot lie flat against the wall.
• For some of you this may be as far as you can go.
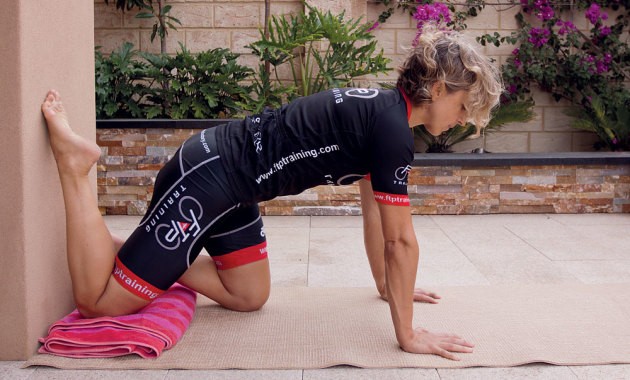
• Step the other leg forward, positioning your foot directly under the knee and bring your body upright.
• It is easy to overcompensate in this position by arching your lower back – do not do this.
• Instead focus on squeezing your glutes; this should help drive the hips forward so you feel an intense stretch in the right quad and hip.
• This stretch is very intense, and should be eased into and not rushed. It may take a while before you can get your torso in to an upright position.
• Hold this stretch for 30 seconds to 1 minute before repeating on the opposite side.
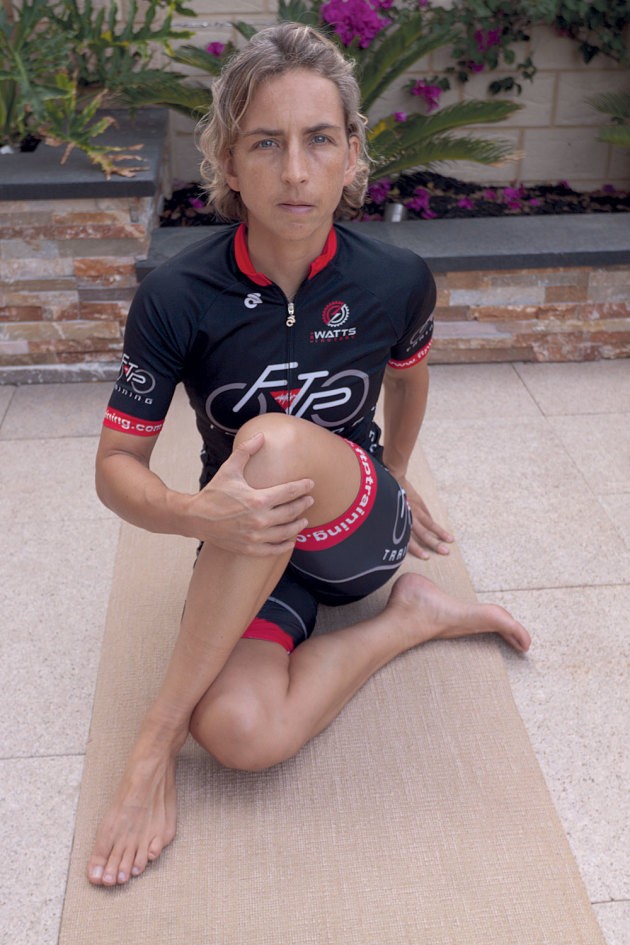
5. Seated Glute Stretch
The gluteal muscles are the strongest muscle group in the body. They help straighten the hip and provide power primarily through the first 90 degrees of the pedal stroke. Maintaining their flexibility is important for them to function properly. This exercise targets the glutes and will also work on a smaller muscle called the piriformis that can be responsible for referred pain in the back and legs.
• Sit on the floor with one leg bent in front so the heel rests near the opposite buttock.
• Cross the other leg over, maintain a strong upright posture and elongate through your spine.
• You should aim to distribute your weight evenly through both buttocks although don’t be surprised if one side is elevated. As you ease into the position it will even out.
• Hold this stretch for 30 seconds to 1 minute before repeating on the opposite side.
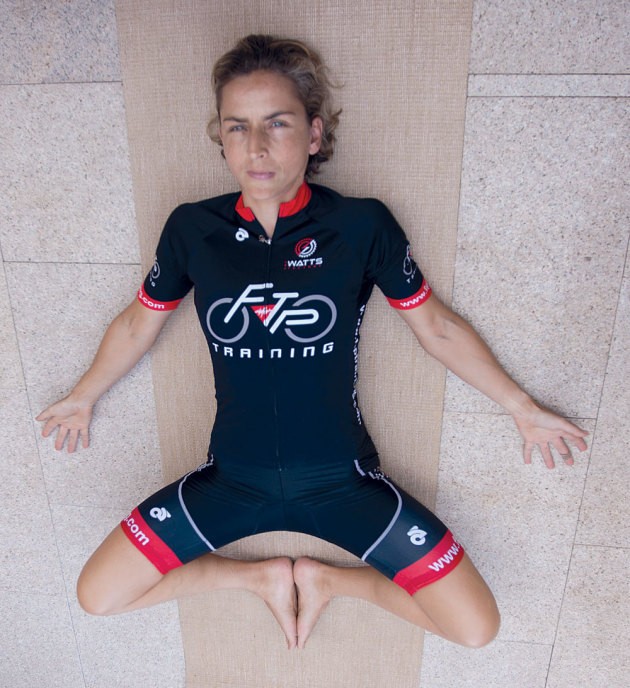
6. Reclined Cobbler pose
This is a great passive hip opener as well working on stretching out the groin area. If you have a groin or knee injury then only perform this pose with blanket support under the outer thighs.
• Begin seated with your legs extended in front of you.
• Bend your knees and draw your heels in toward your pelvis.
• Press the soles of your feet together and let your knees drop open to both sides.
• Lean backward and bring your elbows to the floor. Then, lower your back all the way to the floor.
• Gently shift your buttocks from side to side, adjusting your position so your spine lengthens along the floor while maintaining the natural curve of the lower back.
• Draw your shoulder blades gently inward and let your arms relax with your palms facing up.
• Stay in this position for 1 minute initially, working your way up to 5 minutes. Use you hands to lift your knees together as you exit this pose.